Fill, Move & Delete Cells
Learn how to fill, move, and delete cells quickly in Excel
Fill, Move & Delete Cells
Now that you know how to select cells, let's learn how to work with them! You'll discover how to copy data quickly, move things around, and remove what you don't need.
These are the most common operations you'll do in Excel every day.
The Fill Handle - Your Magic Tool
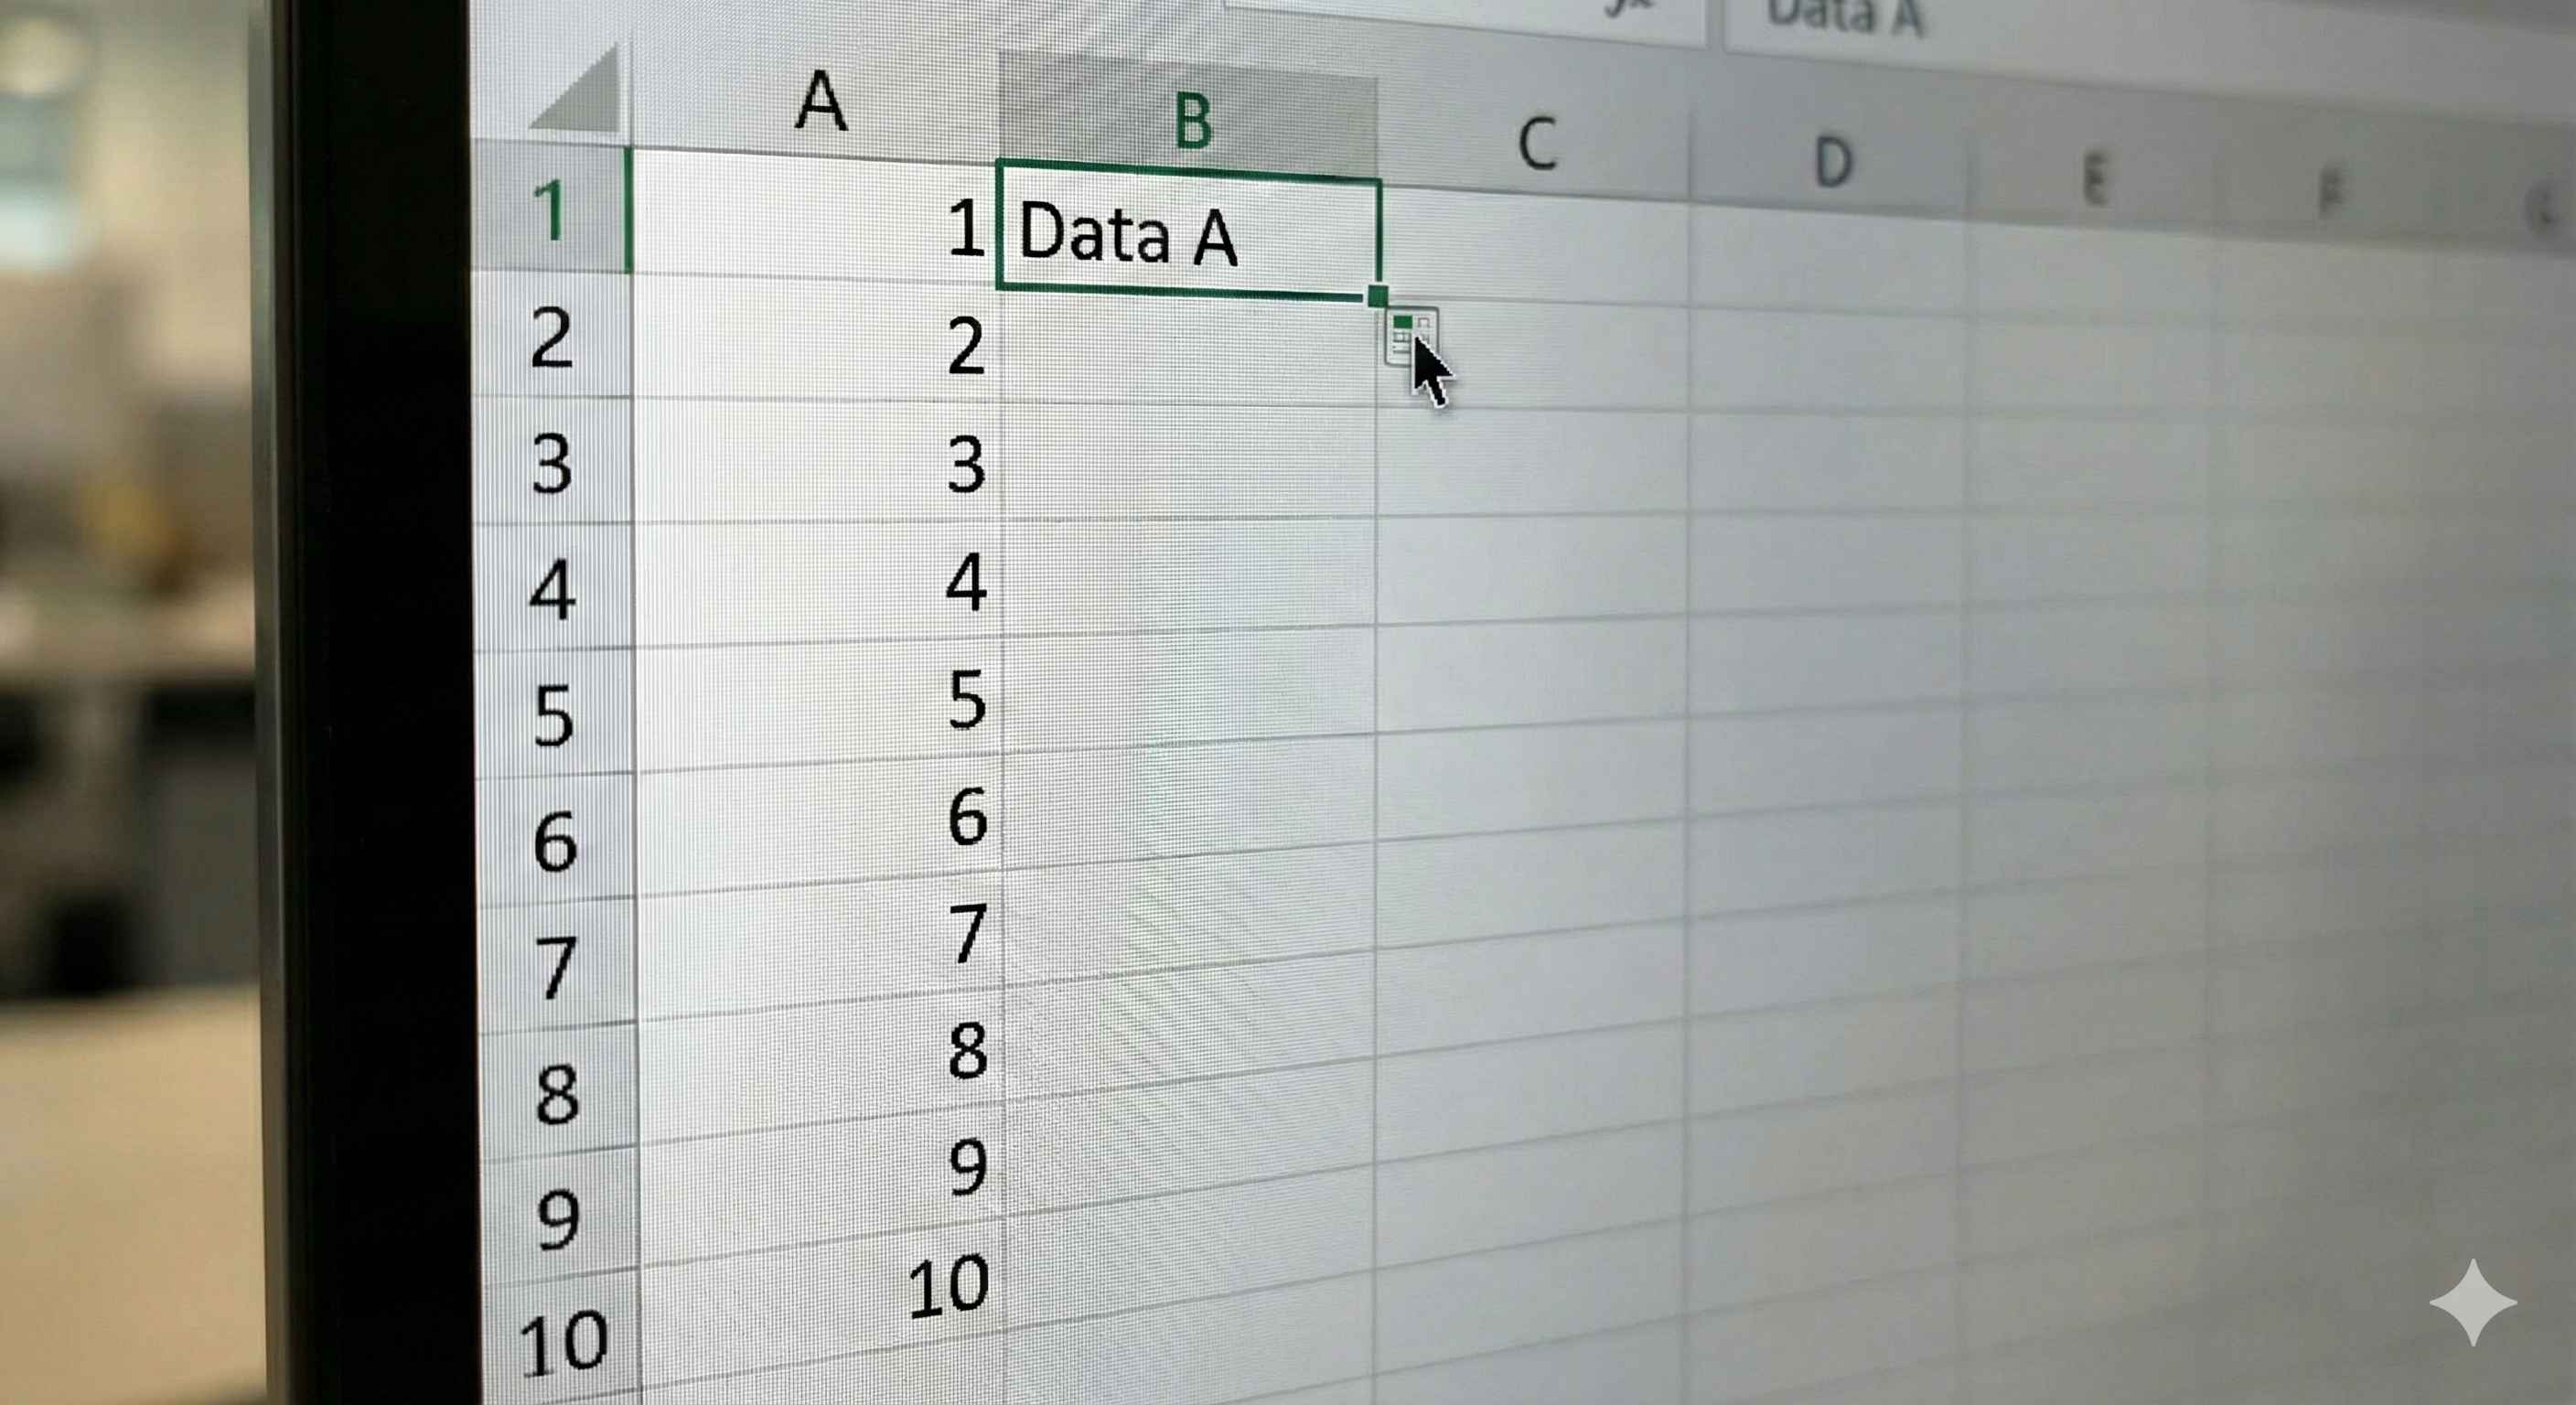
The Fill Handle is a tiny square at the bottom-right corner of your selected cell. It's one of Excel's most powerful features!
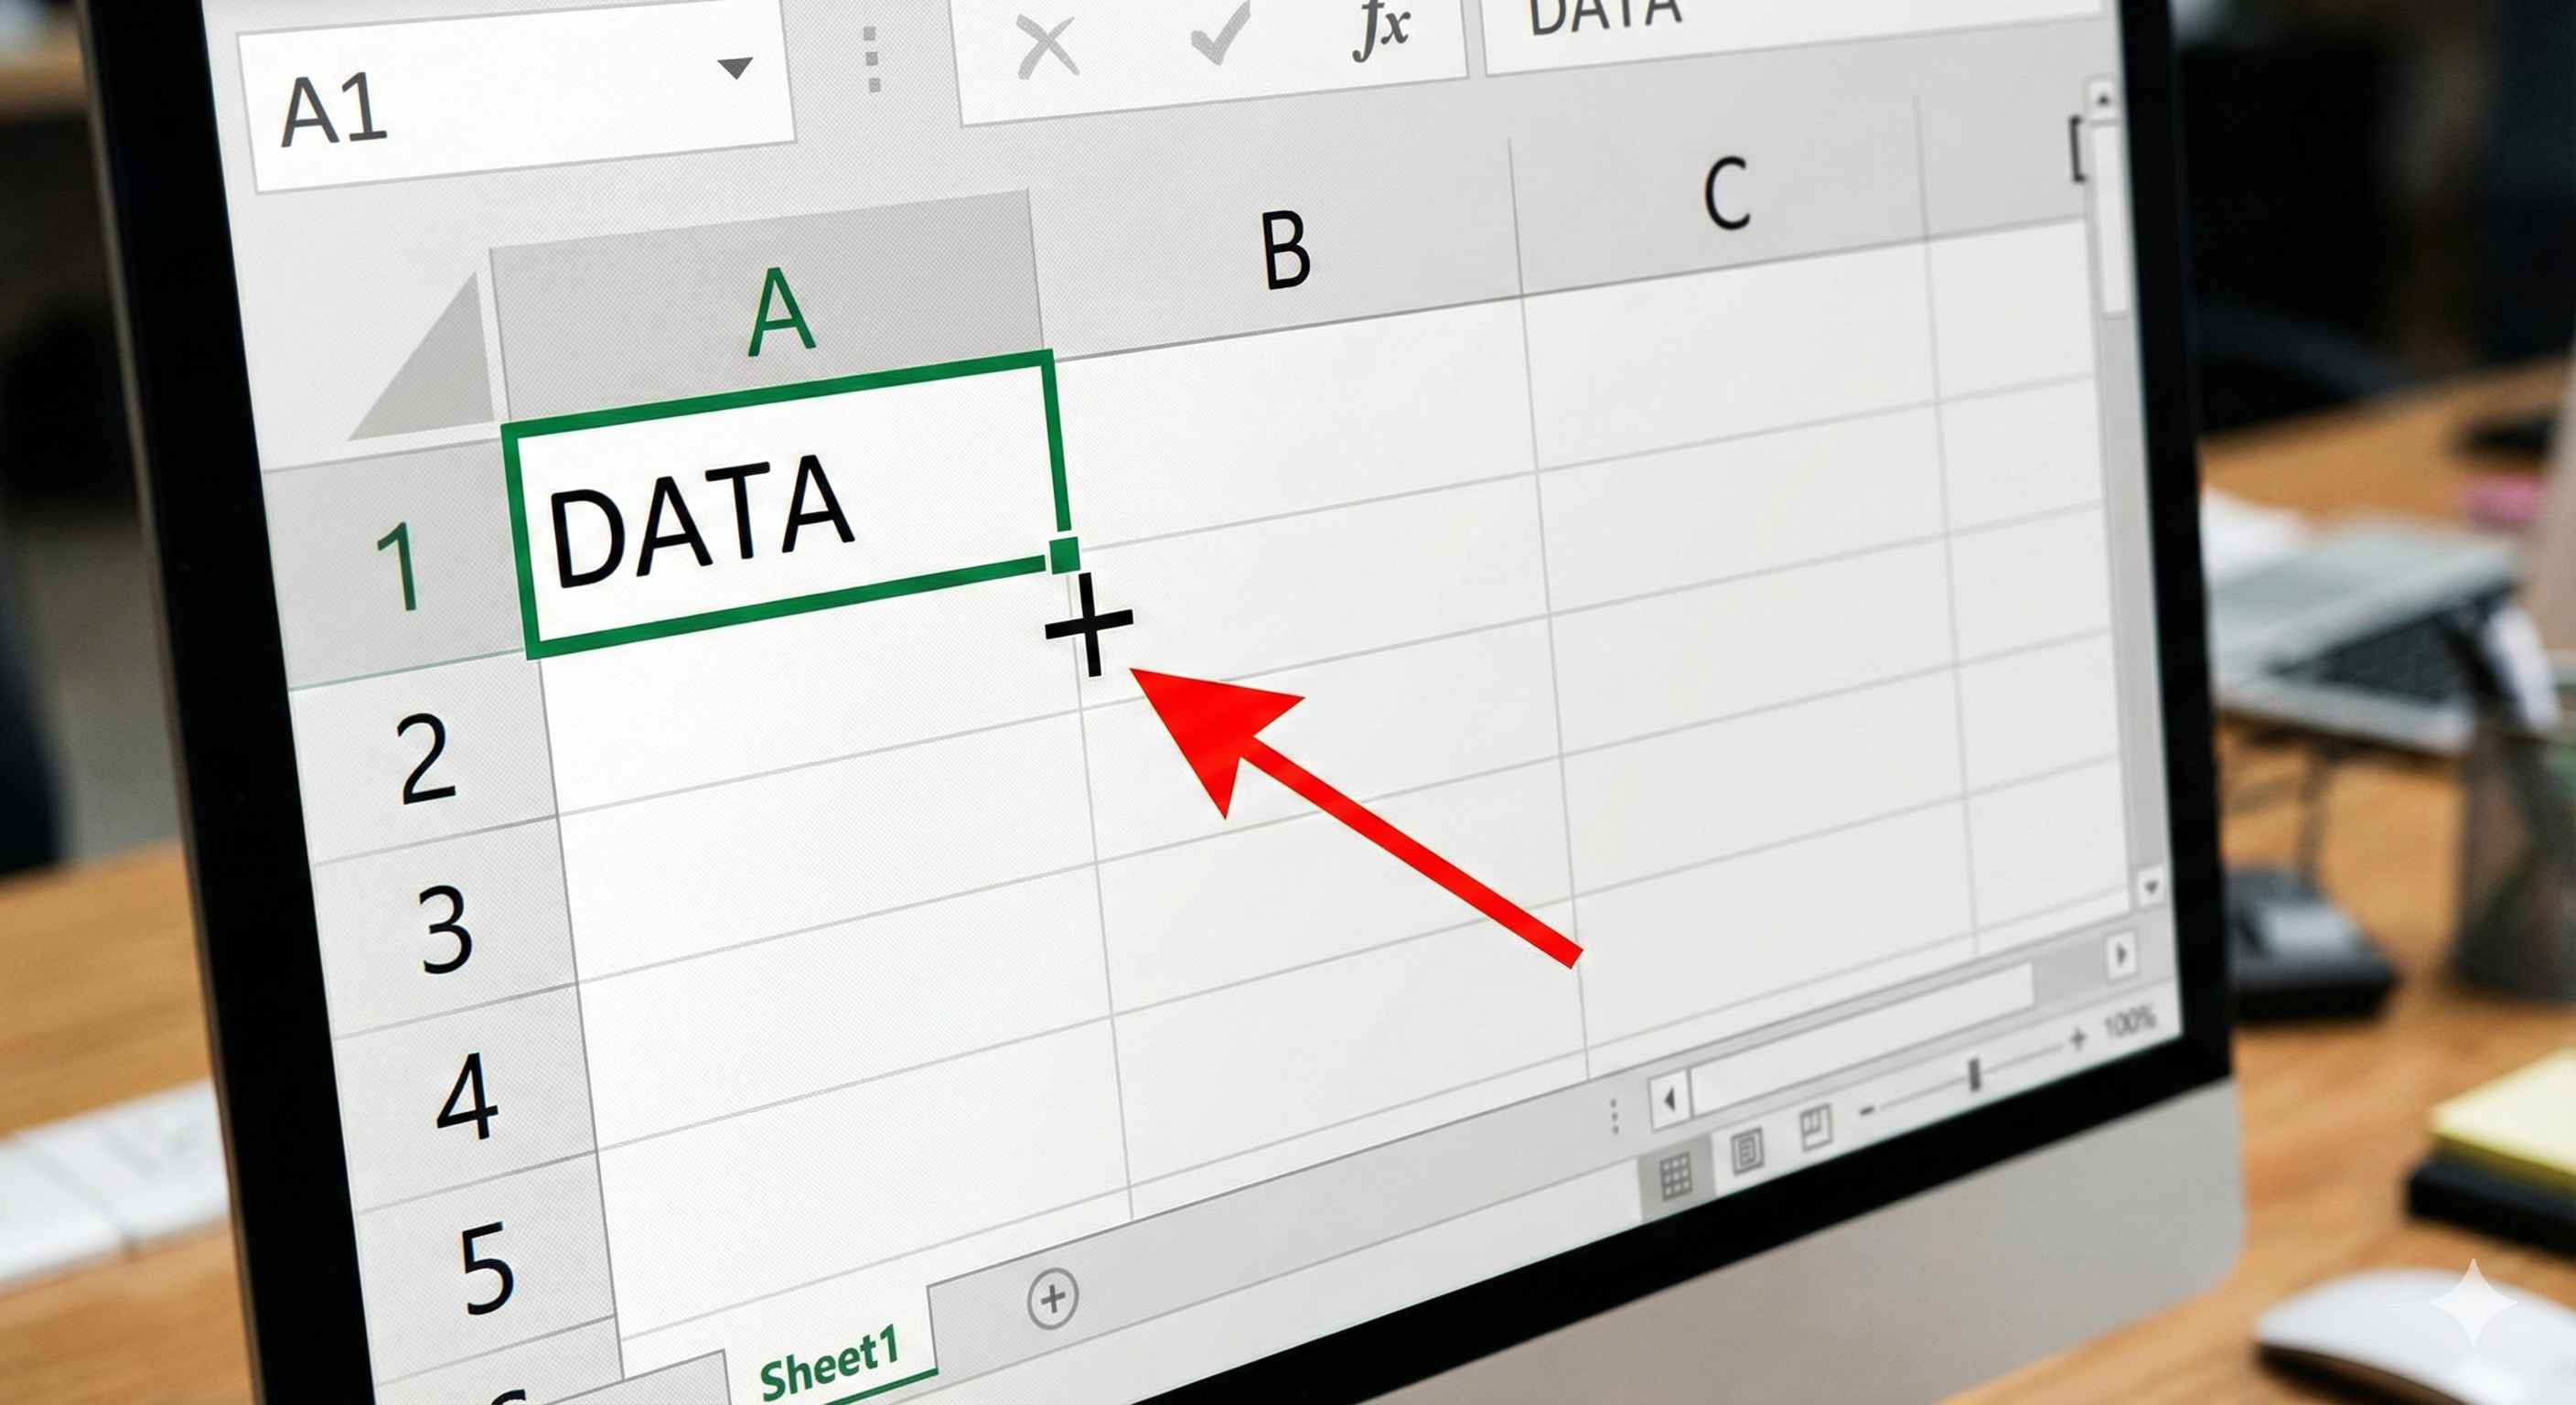
When you hover over it, your cursor changes to a + (plus sign). That's when the magic happens!
Auto-Fill Numbers
Let's start simple - filling a series of numbers.
How to do it:
- Type 1 in cell A1
- Type 2 in cell A2
- Select both cells A1 and A2
- Hover over the fill handle (bottom-right corner)
- Click and drag down to A10
- Release!
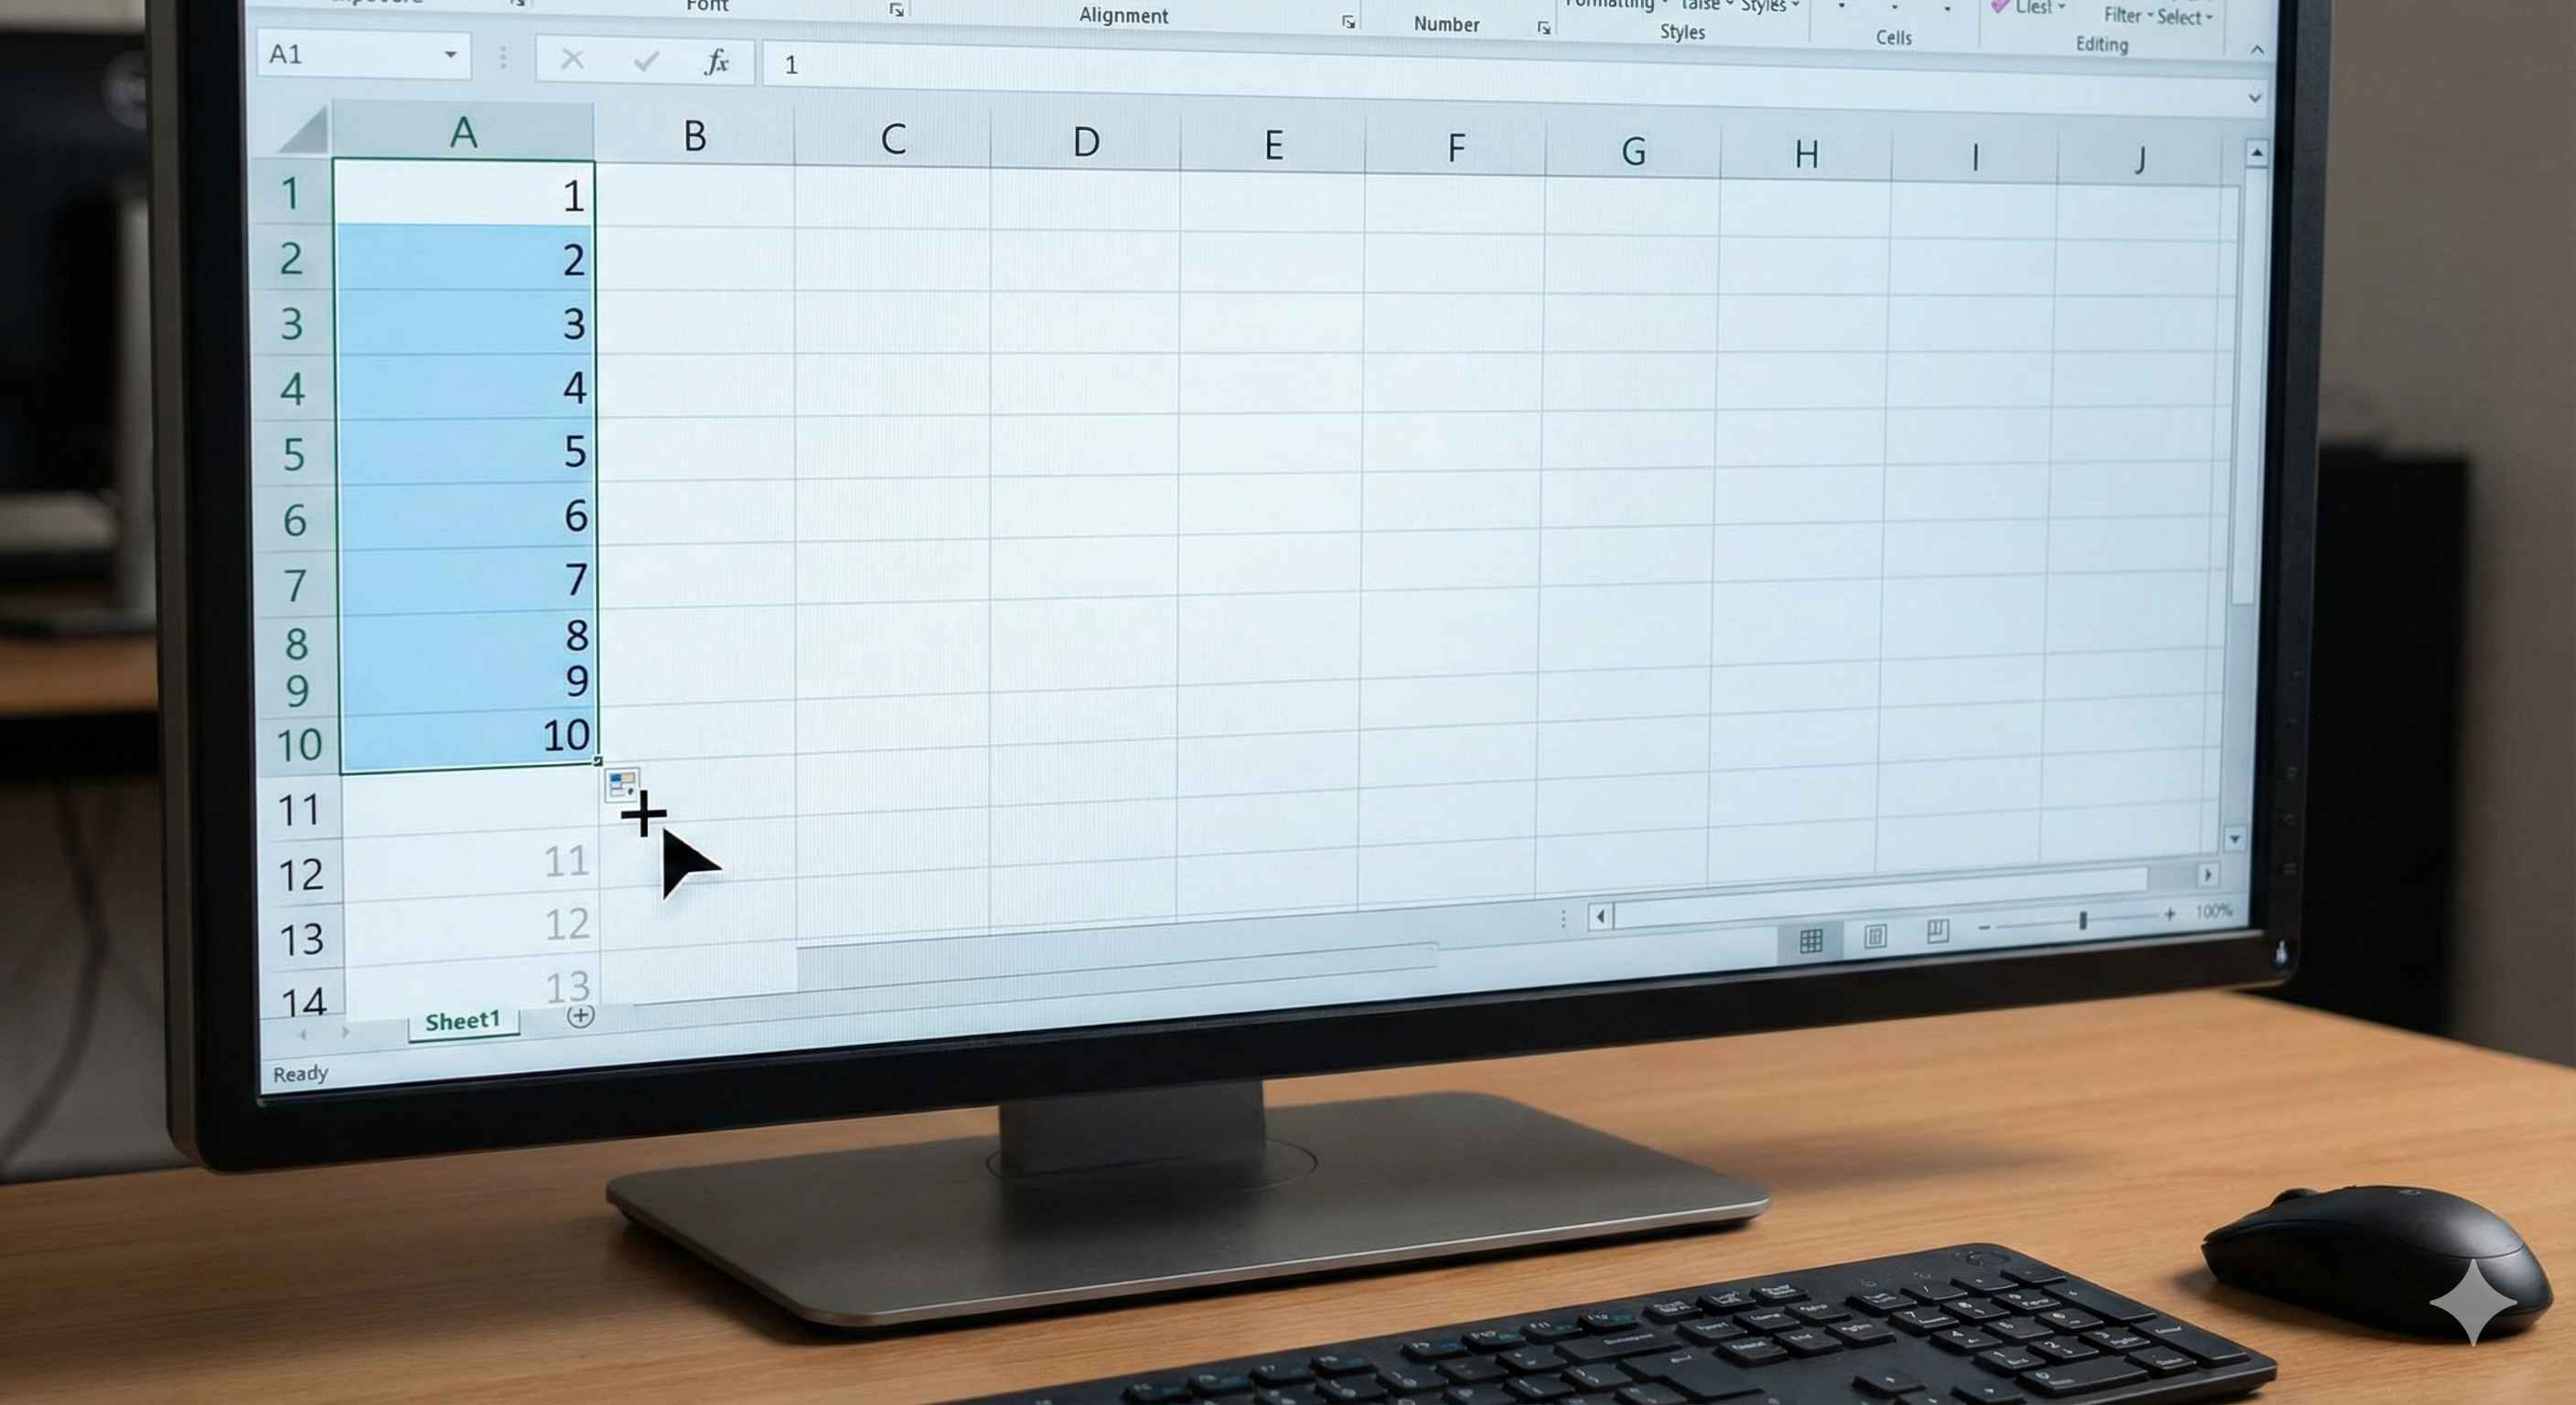
Result: Excel automatically fills 1, 2, 3, 4, 5... all the way to 10! 🎉
Excel is smart - it recognizes the pattern (you went from 1 to 2) and continues it for you.
Auto-Fill Dates
Excel can also fill dates automatically!
Example 1: Sequential Dates
- Type 1/1/2024 in cell B1
- Grab the fill handle
- Drag down to B7
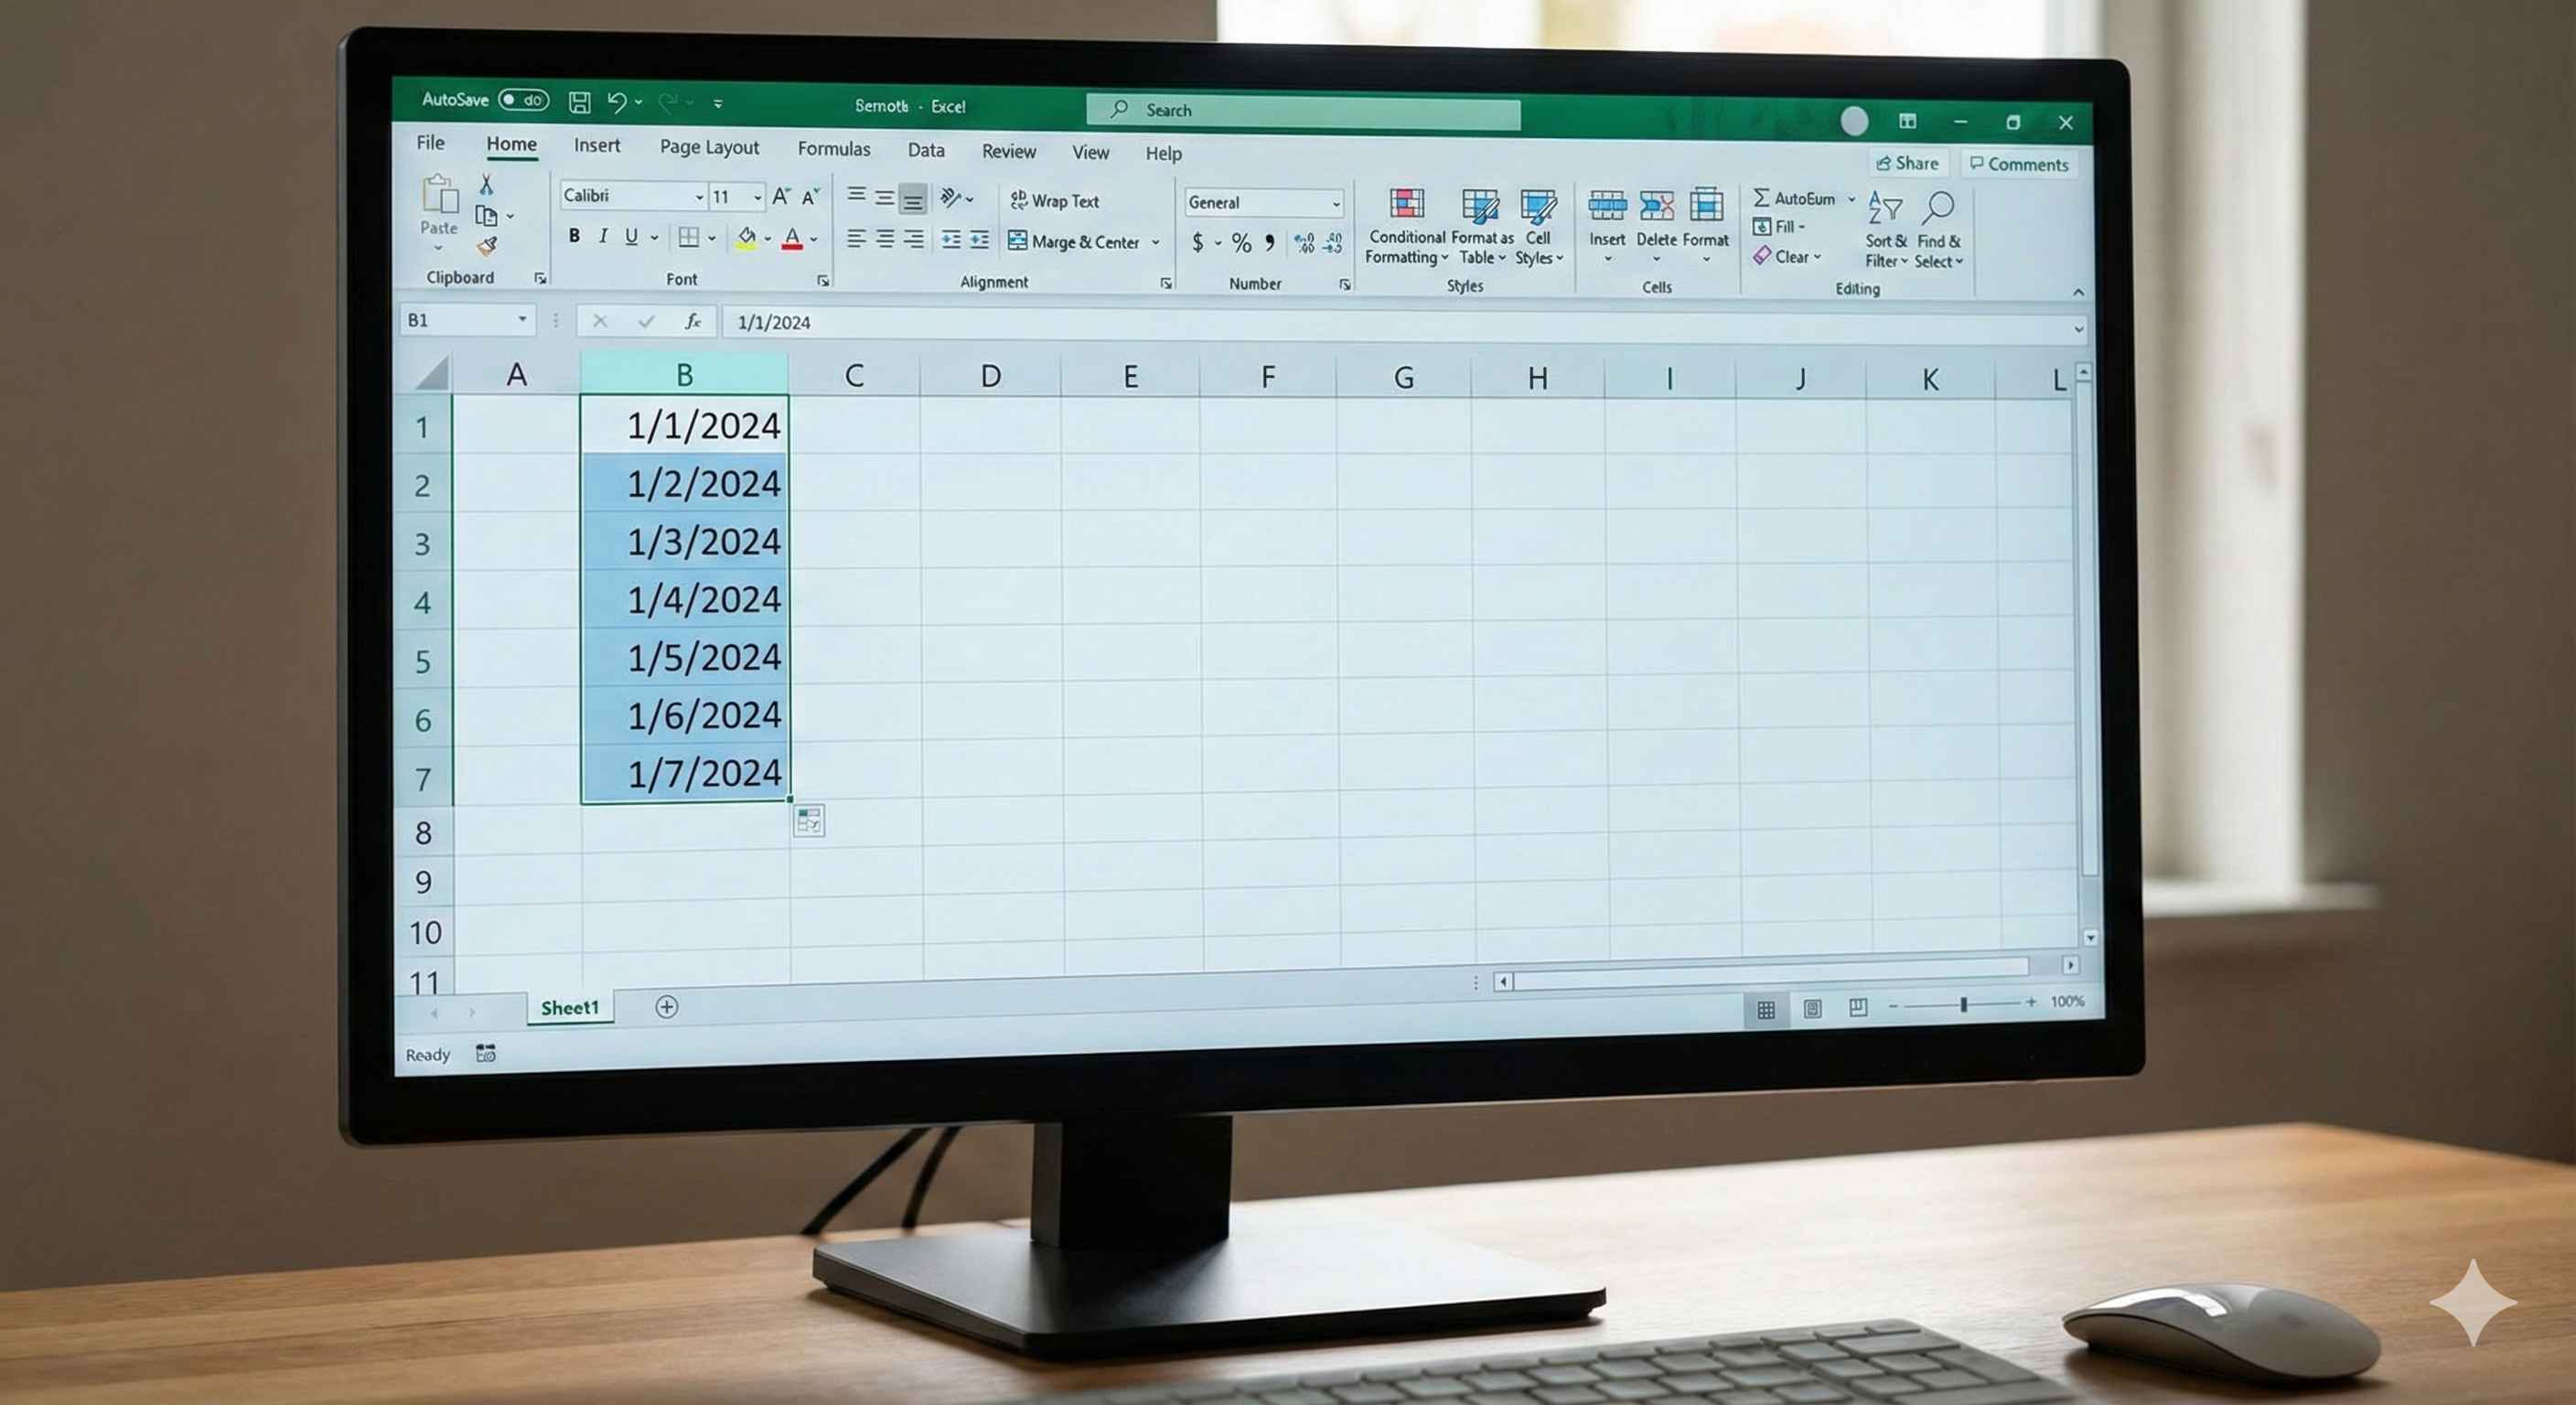
Result: You get 1/1/2024, 1/2/2024, 1/3/2024... (consecutive days)
Example 2: Same Weekday Pattern
- Type Monday in cell C1
- Type Tuesday in cell C2
- Select both
- Drag down
Result: Wednesday, Thursday, Friday, Saturday, Sunday! Excel knows the days of the week!
Auto-Fill Text
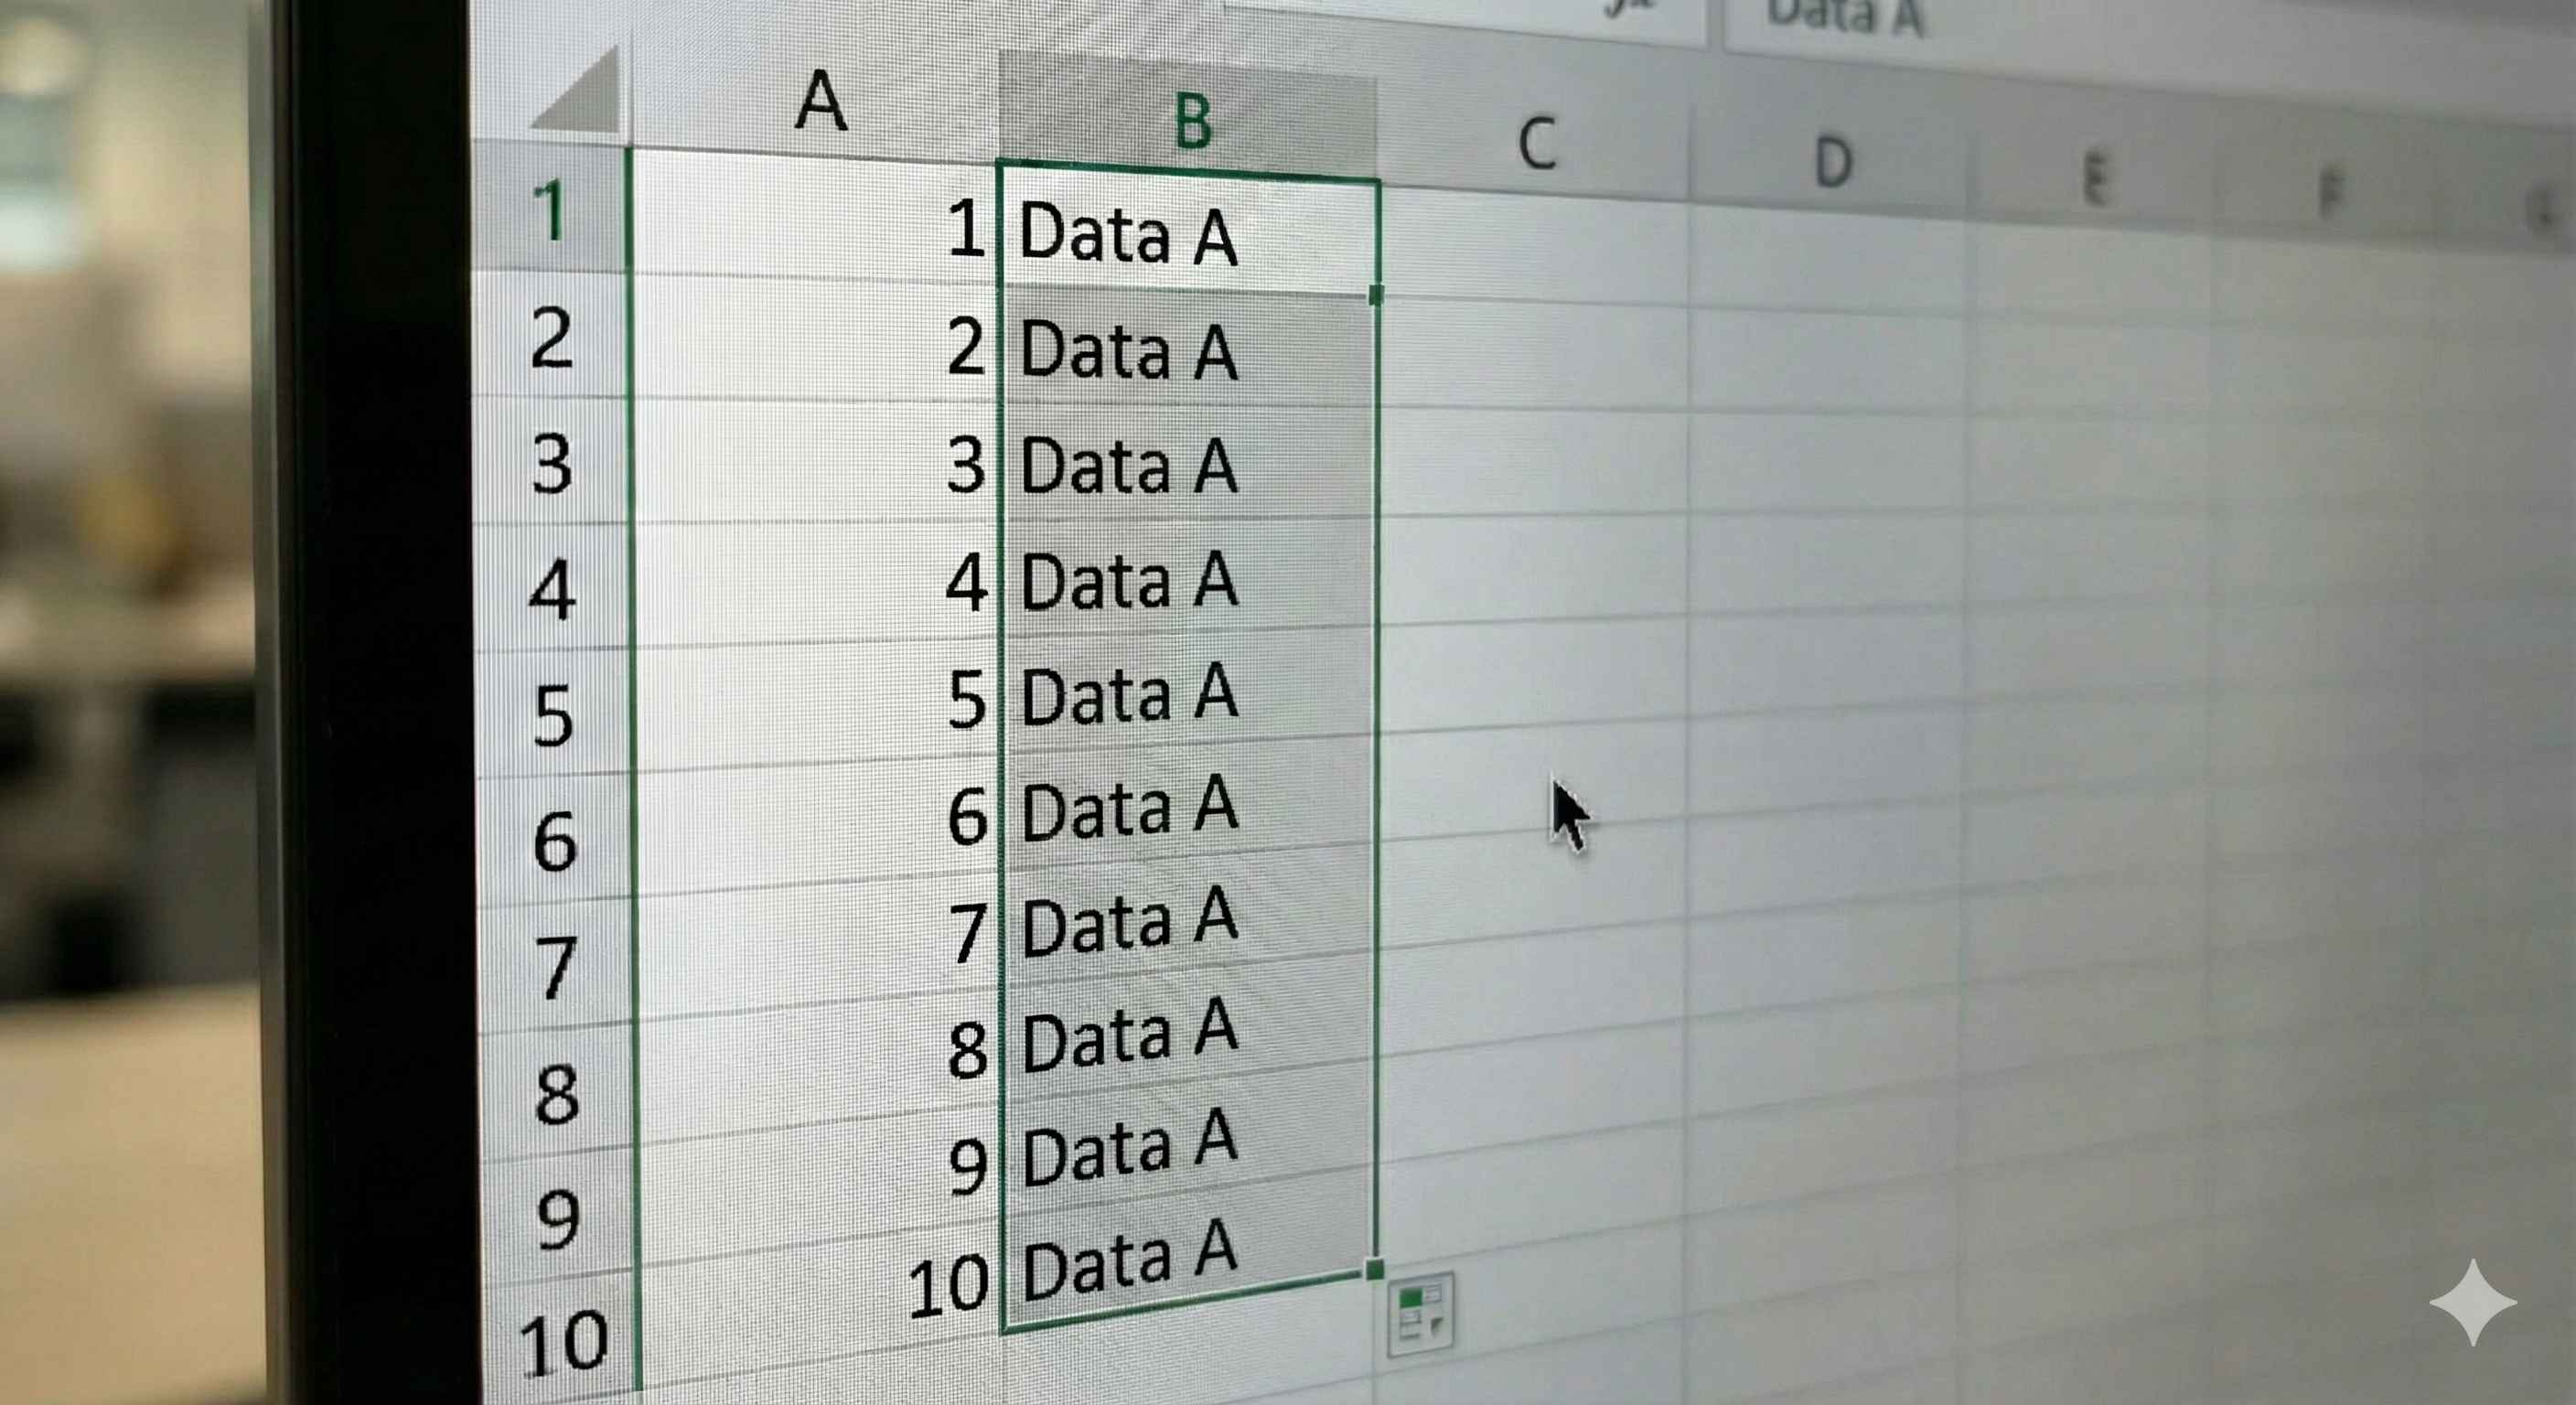
Want to copy the same text to multiple cells?
How to do it:
- Type Product Name in cell A1
- Grab the fill handle
- Drag right to E1
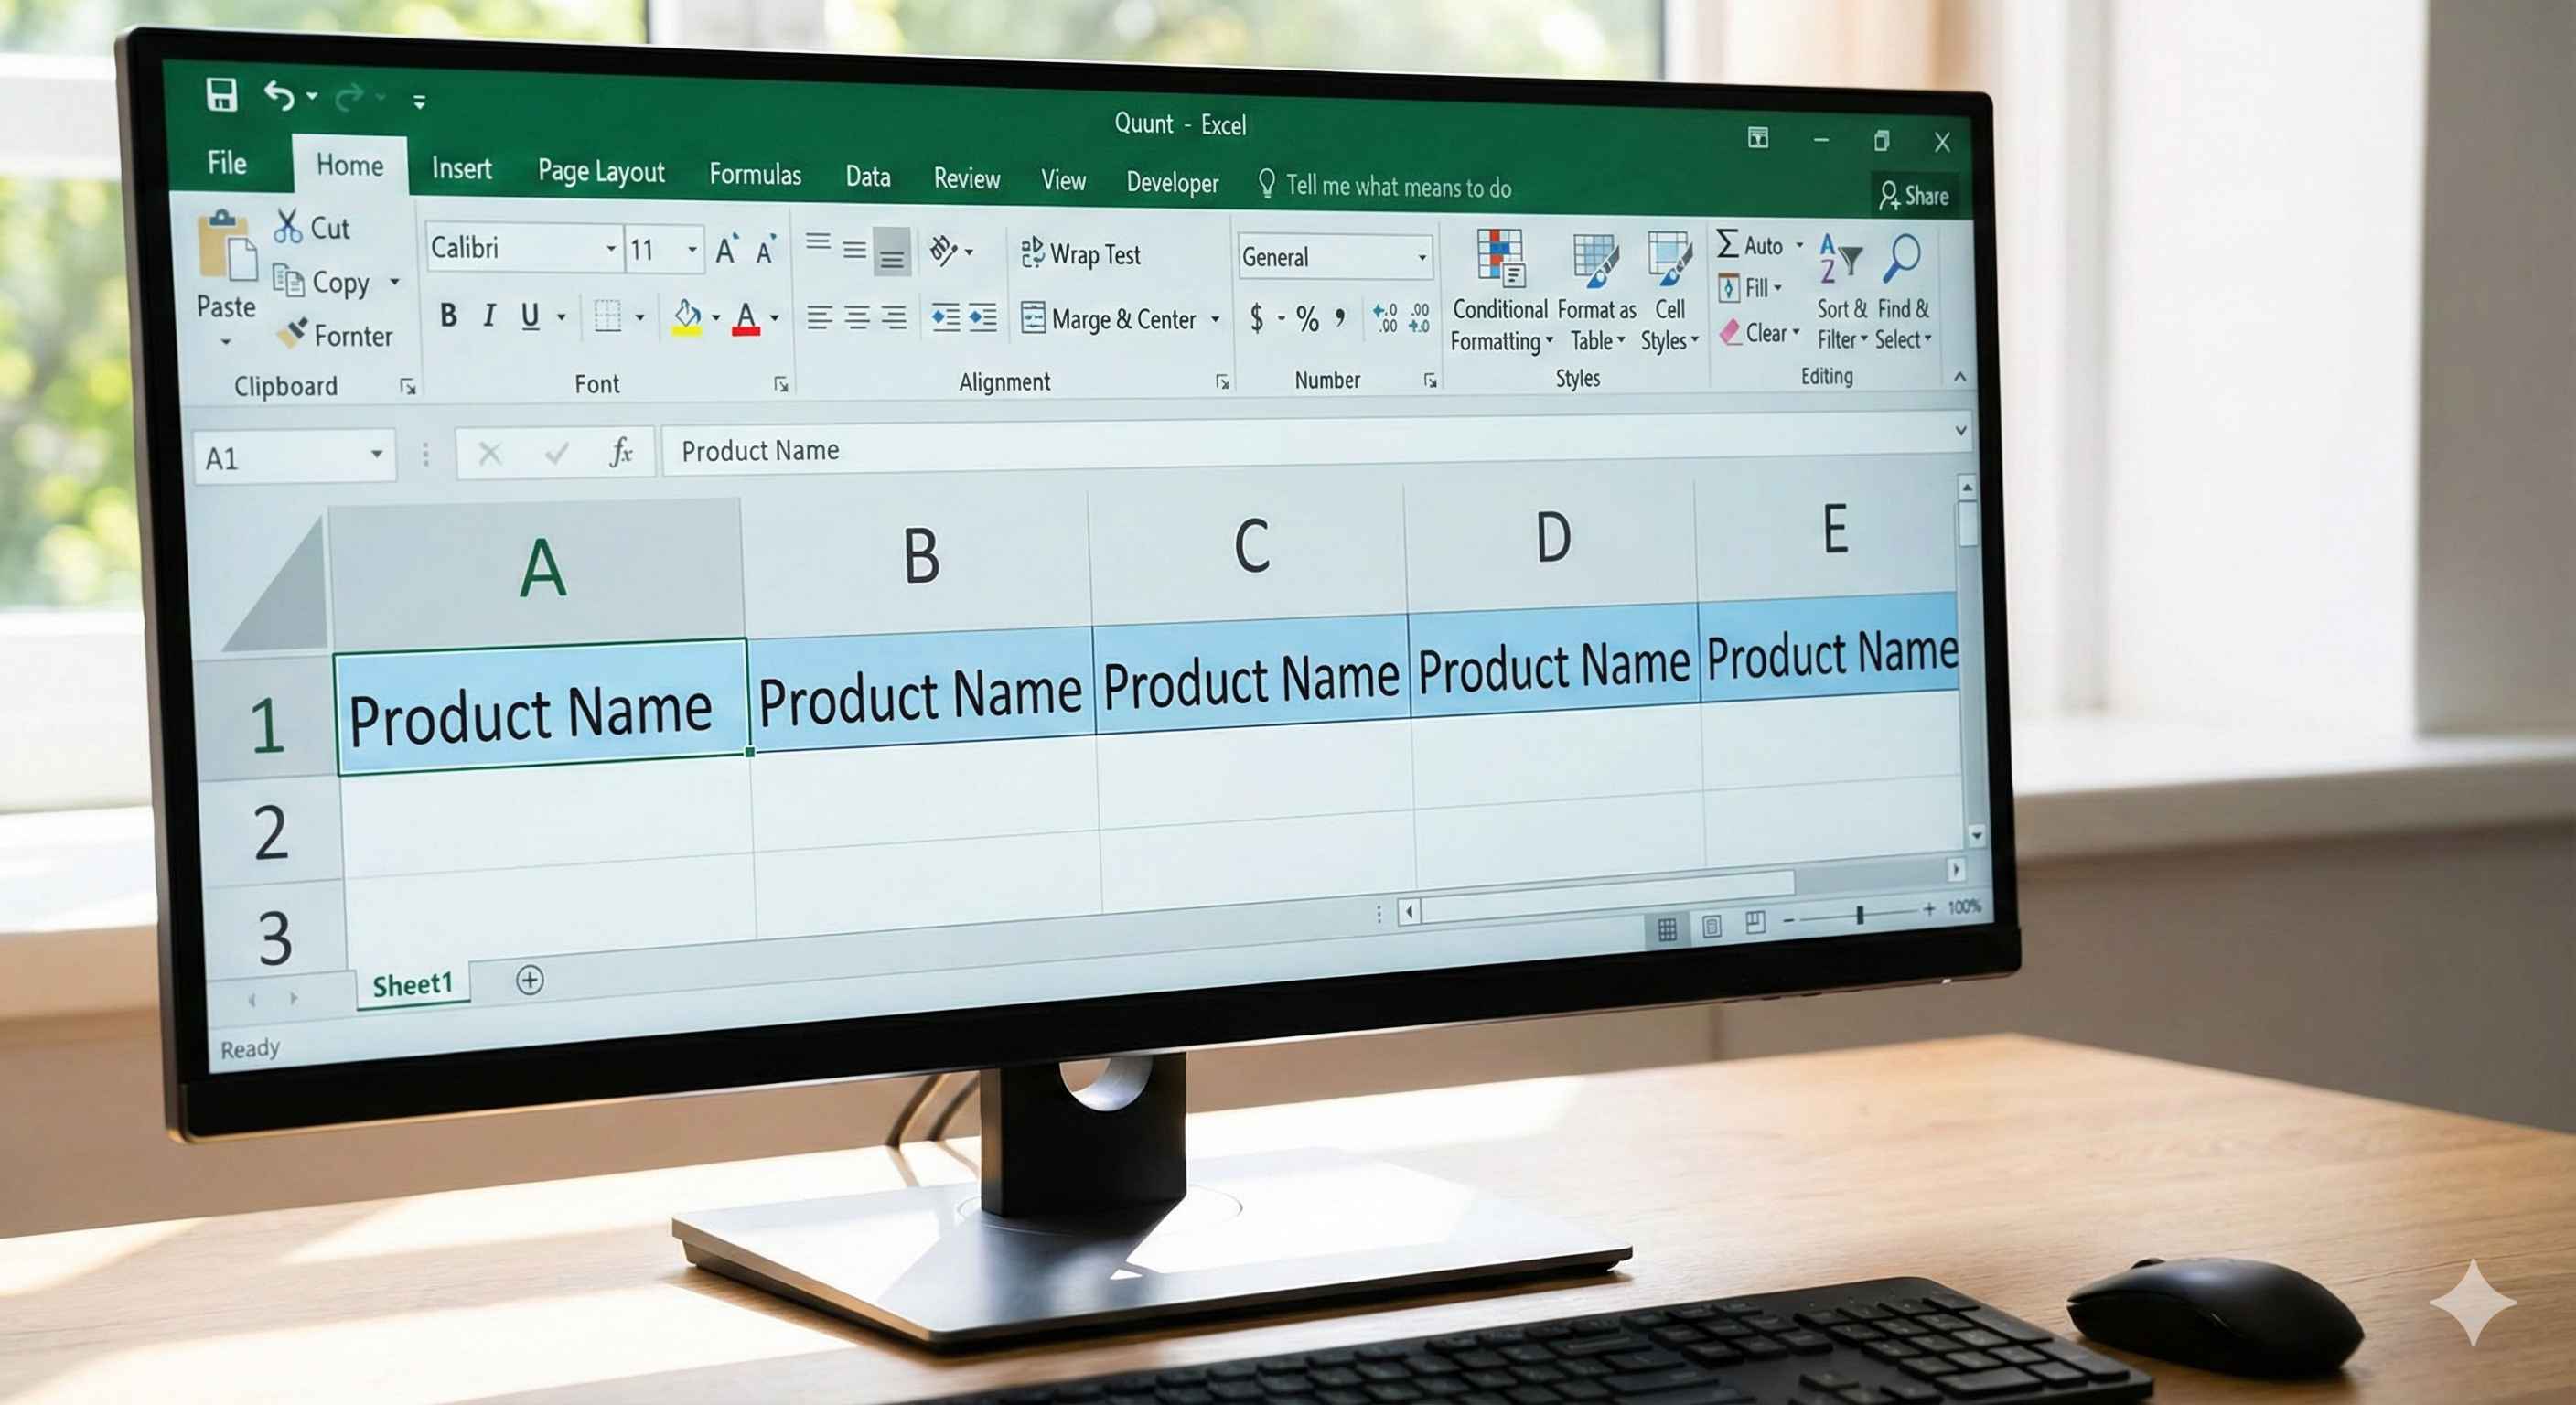
Result: All cells from A1 to E1 now have "Product Name"
Quick Tip: When you drag text, Excel copies it. When you drag numbers with a pattern, Excel continues the series.
Auto-Fill with Double-Click
Here's a secret trick that saves tons of time!
The Double-Click Magic:
Step 1: Type data in cells with adjacent column data

Step 2: Select the starting cell and find the fill handle
Step 3: Double-click the fill handle
Result: Excel automatically fills DOWN to match the length of the adjacent column!
This is perfect when you have a long list and don't want to drag forever.
Fill Options Menu
After you fill, a small icon appears - the Auto Fill Options button.
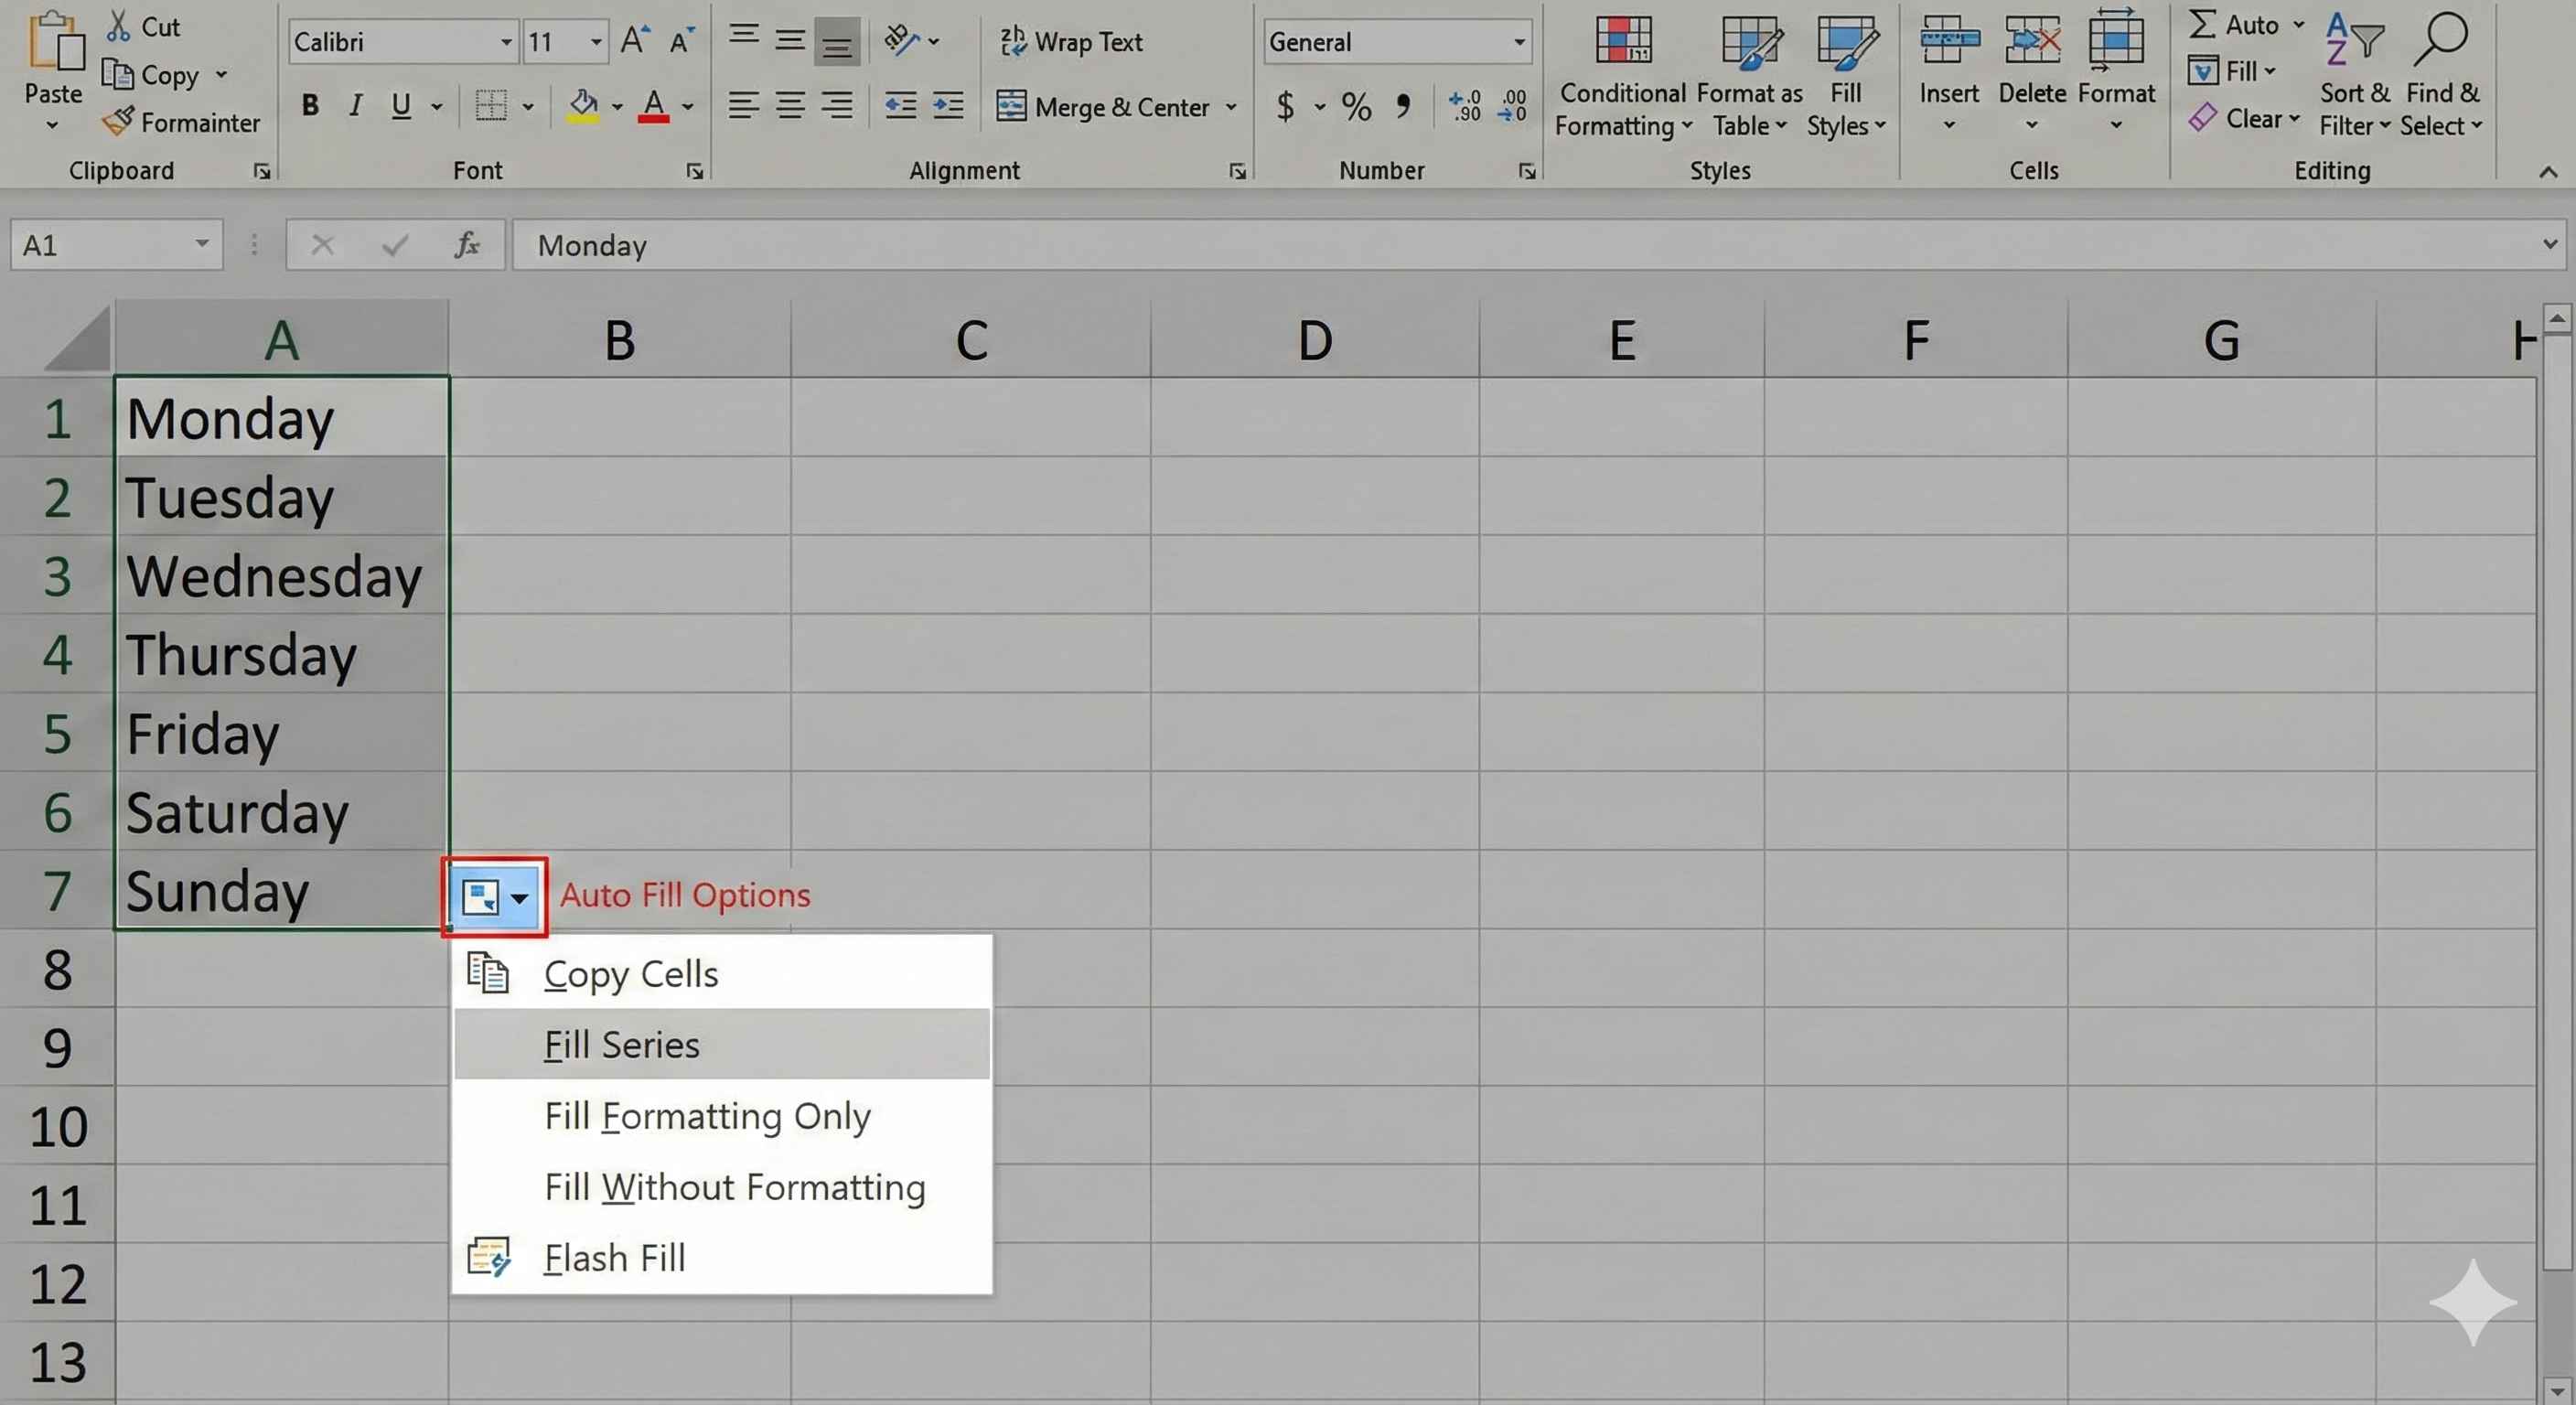
Click it to see options like:
- Copy Cells - Copy everything exactly
- Fill Series - Continue the pattern
- Fill Formatting Only - Copy just the colors/fonts
- Fill Without Formatting - Copy just the values
Try clicking it to see what each option does!
Moving Cells
Need to move data from one place to another? Easy!
Method 1: Cut and Paste
How to do it:
- Select the cell(s) you want to move
- Press Ctrl+X (Windows) or Cmd+X (Mac) to cut
- Click where you want to move it
- Press Ctrl+V (Windows) or Cmd+V (Mac) to paste
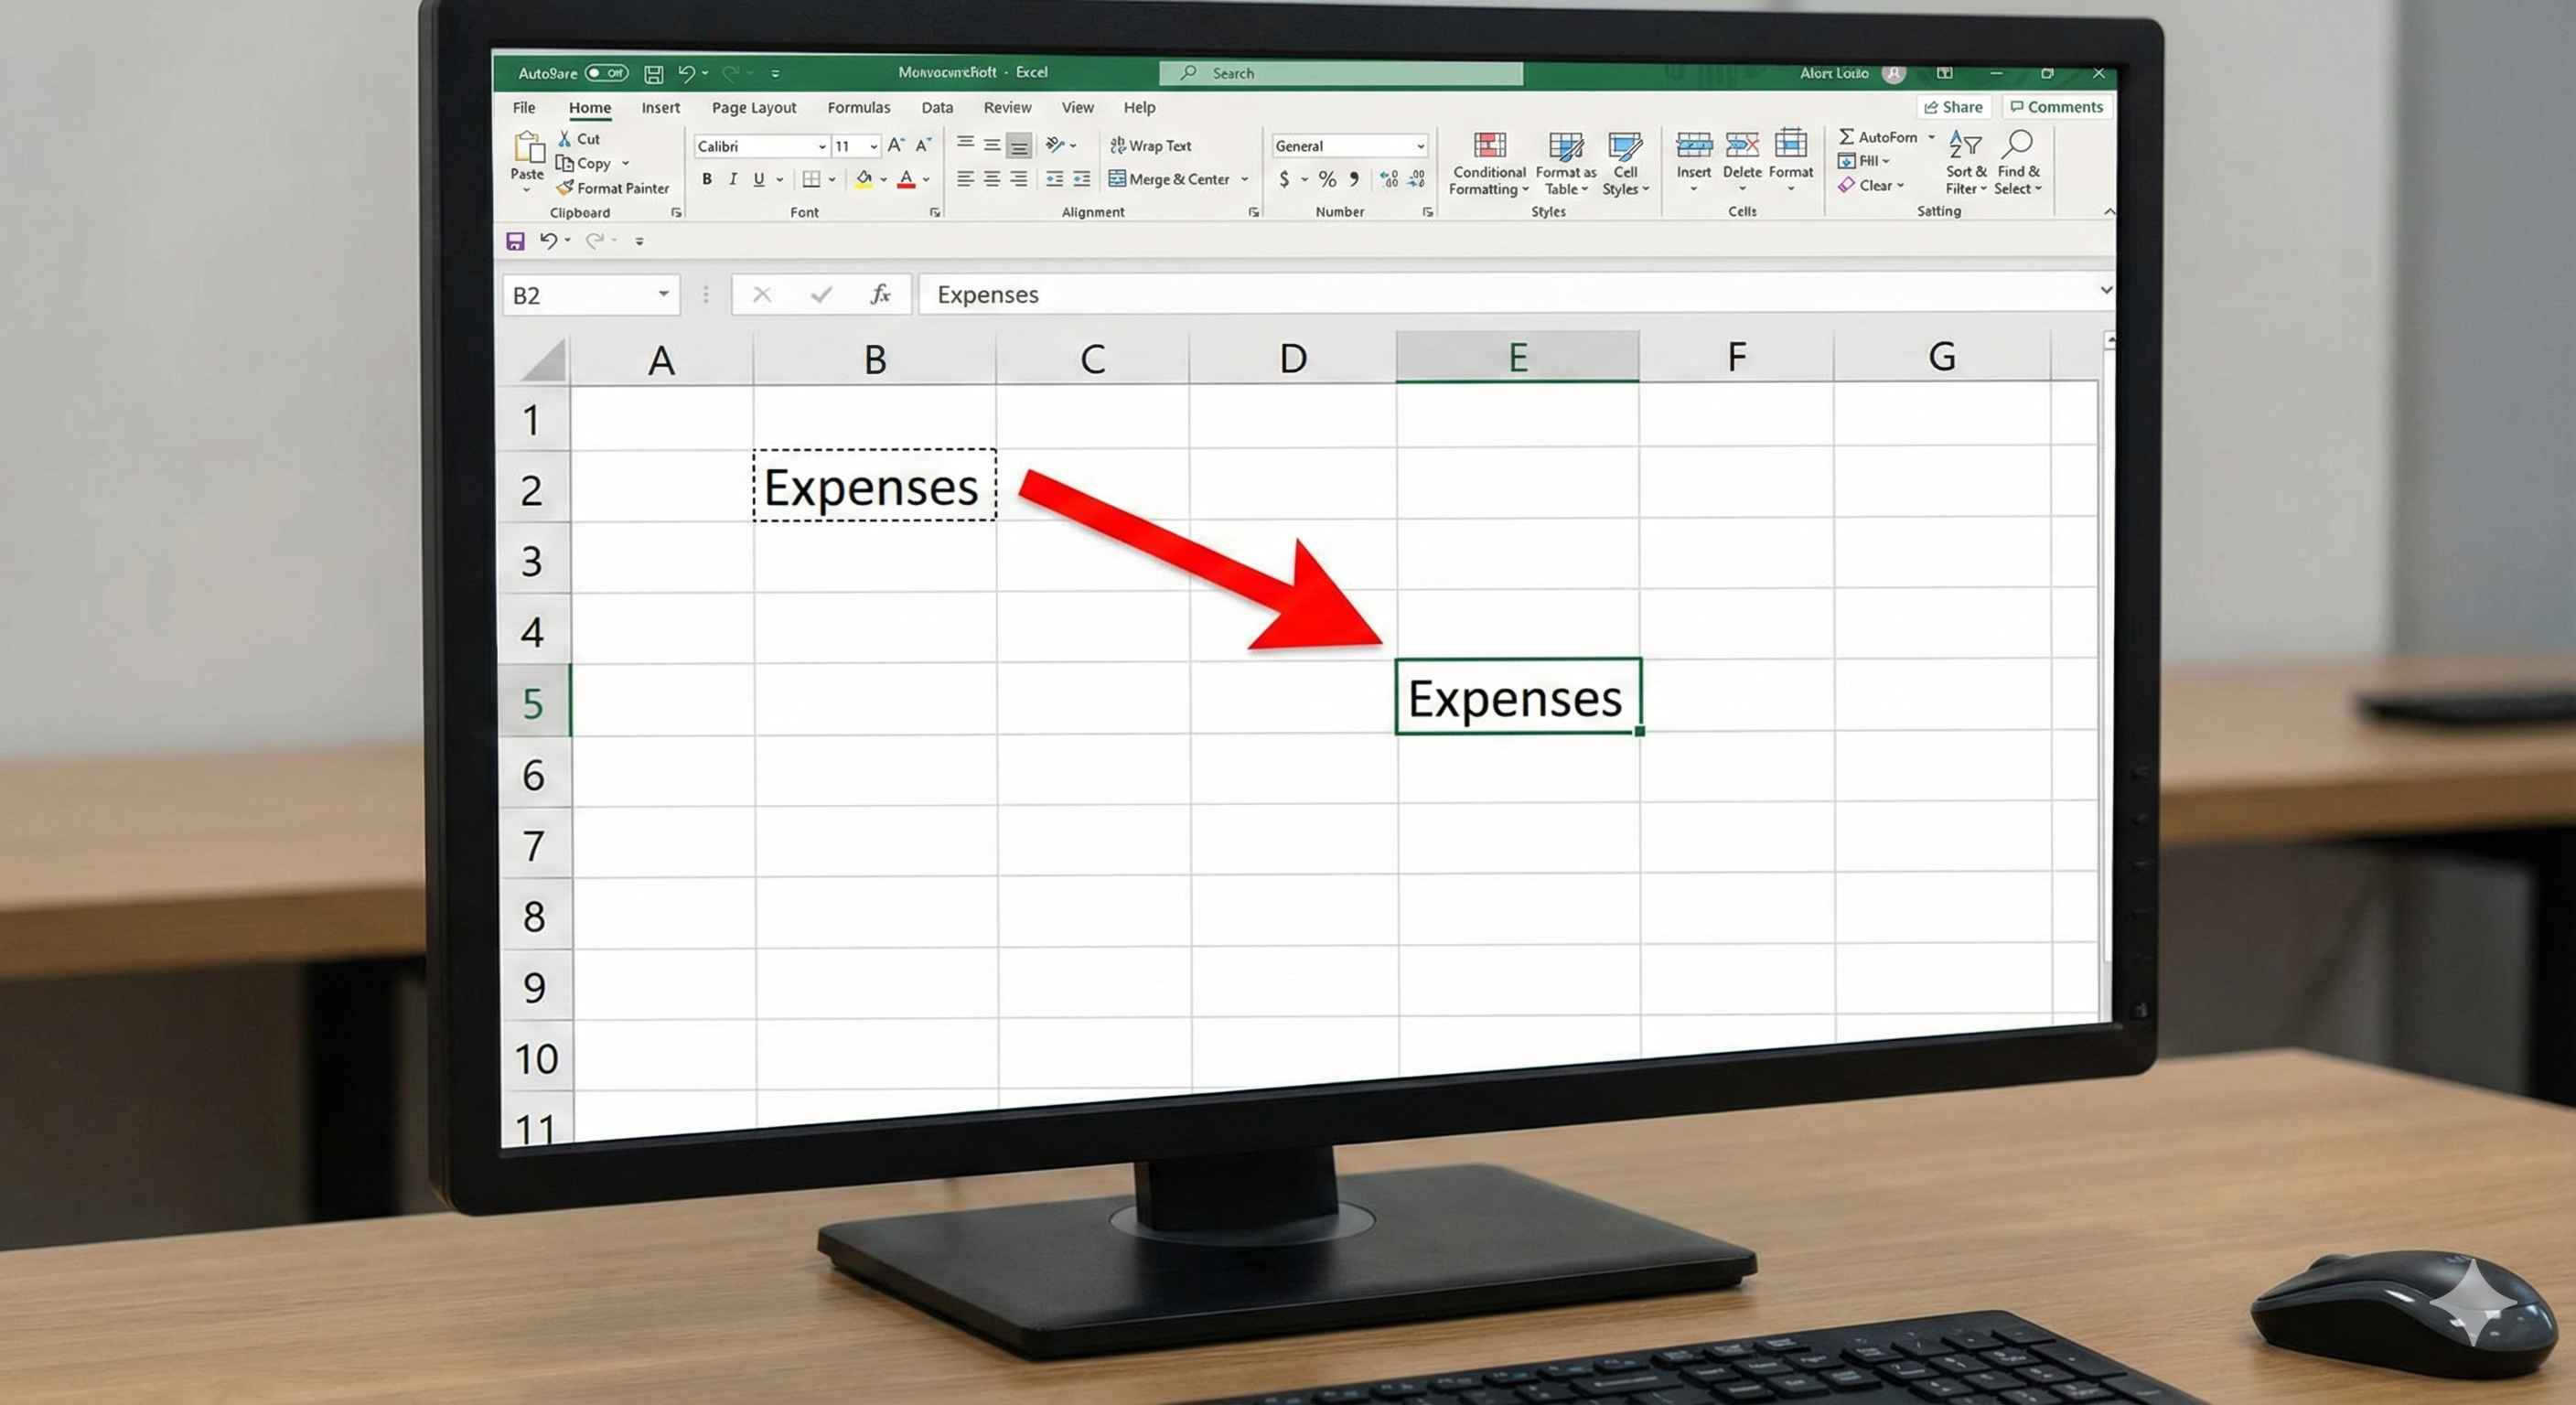
Result: Your data moves to the new location. The old location becomes empty.
Method 2: Drag and Drop
This is faster for nearby moves!
Step 1: Select the cell(s) and move cursor to the edge
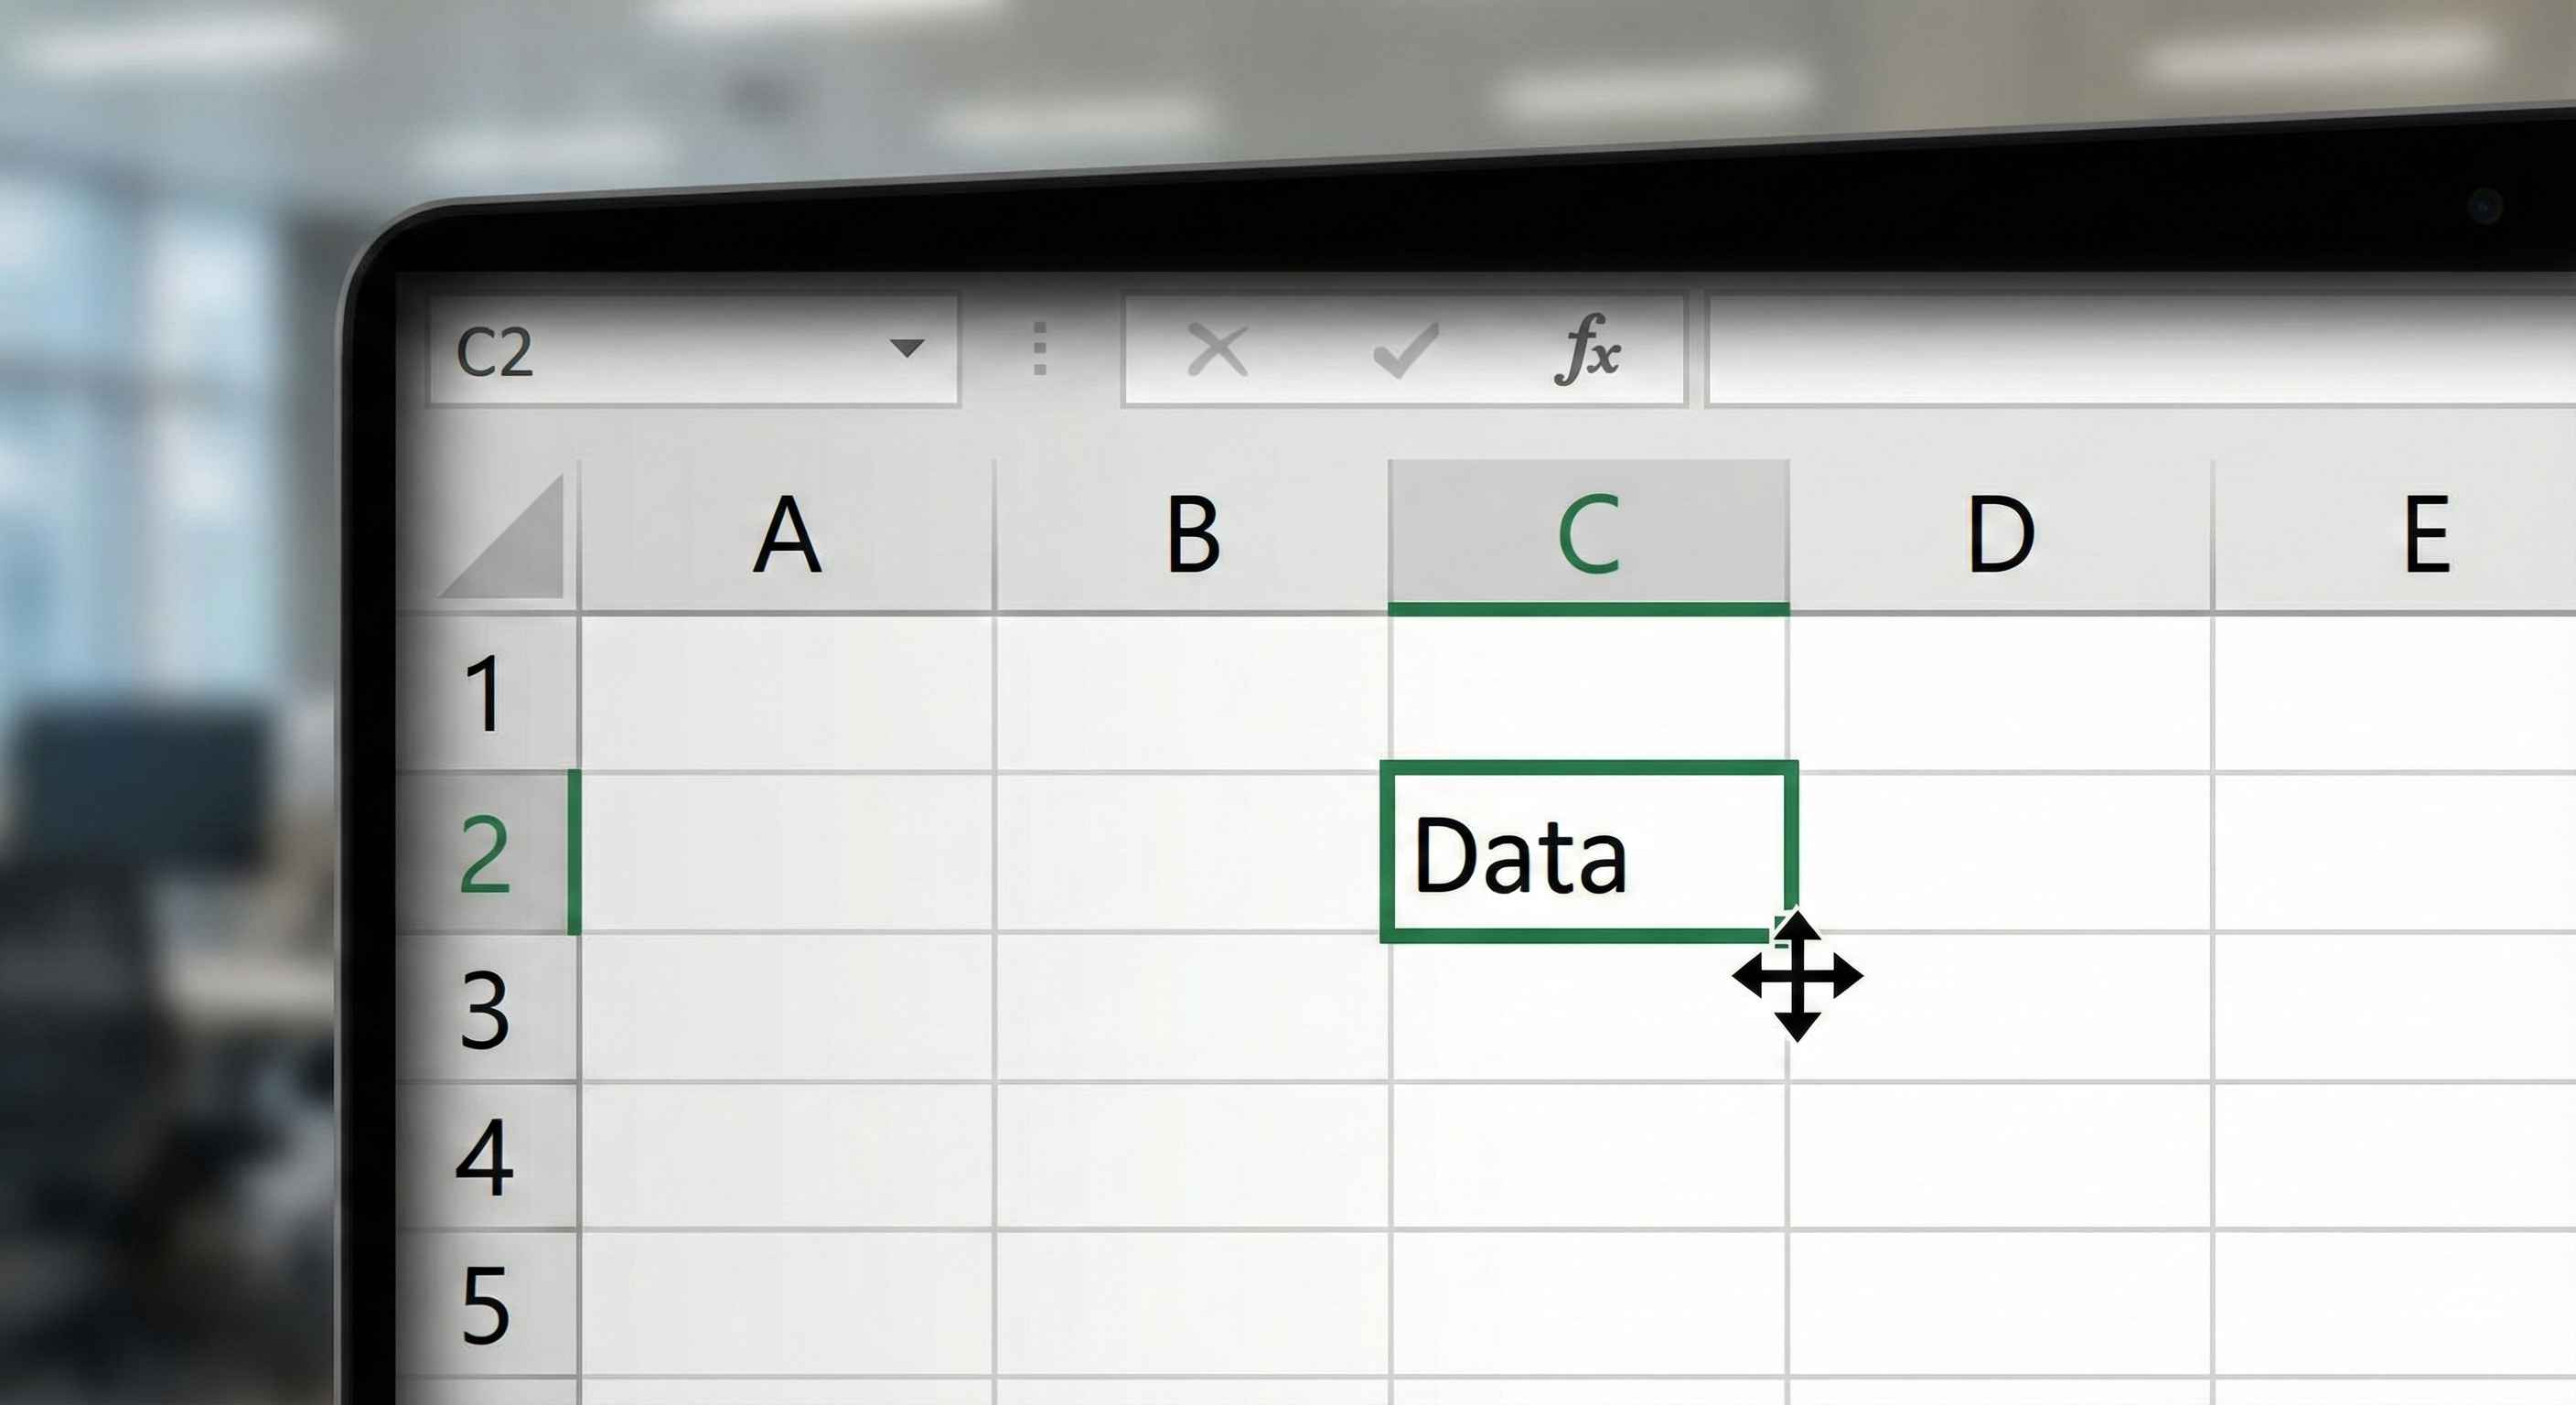
Your cursor becomes a four-arrow cross (not the fill handle!)
Step 2: Click and drag to the new location
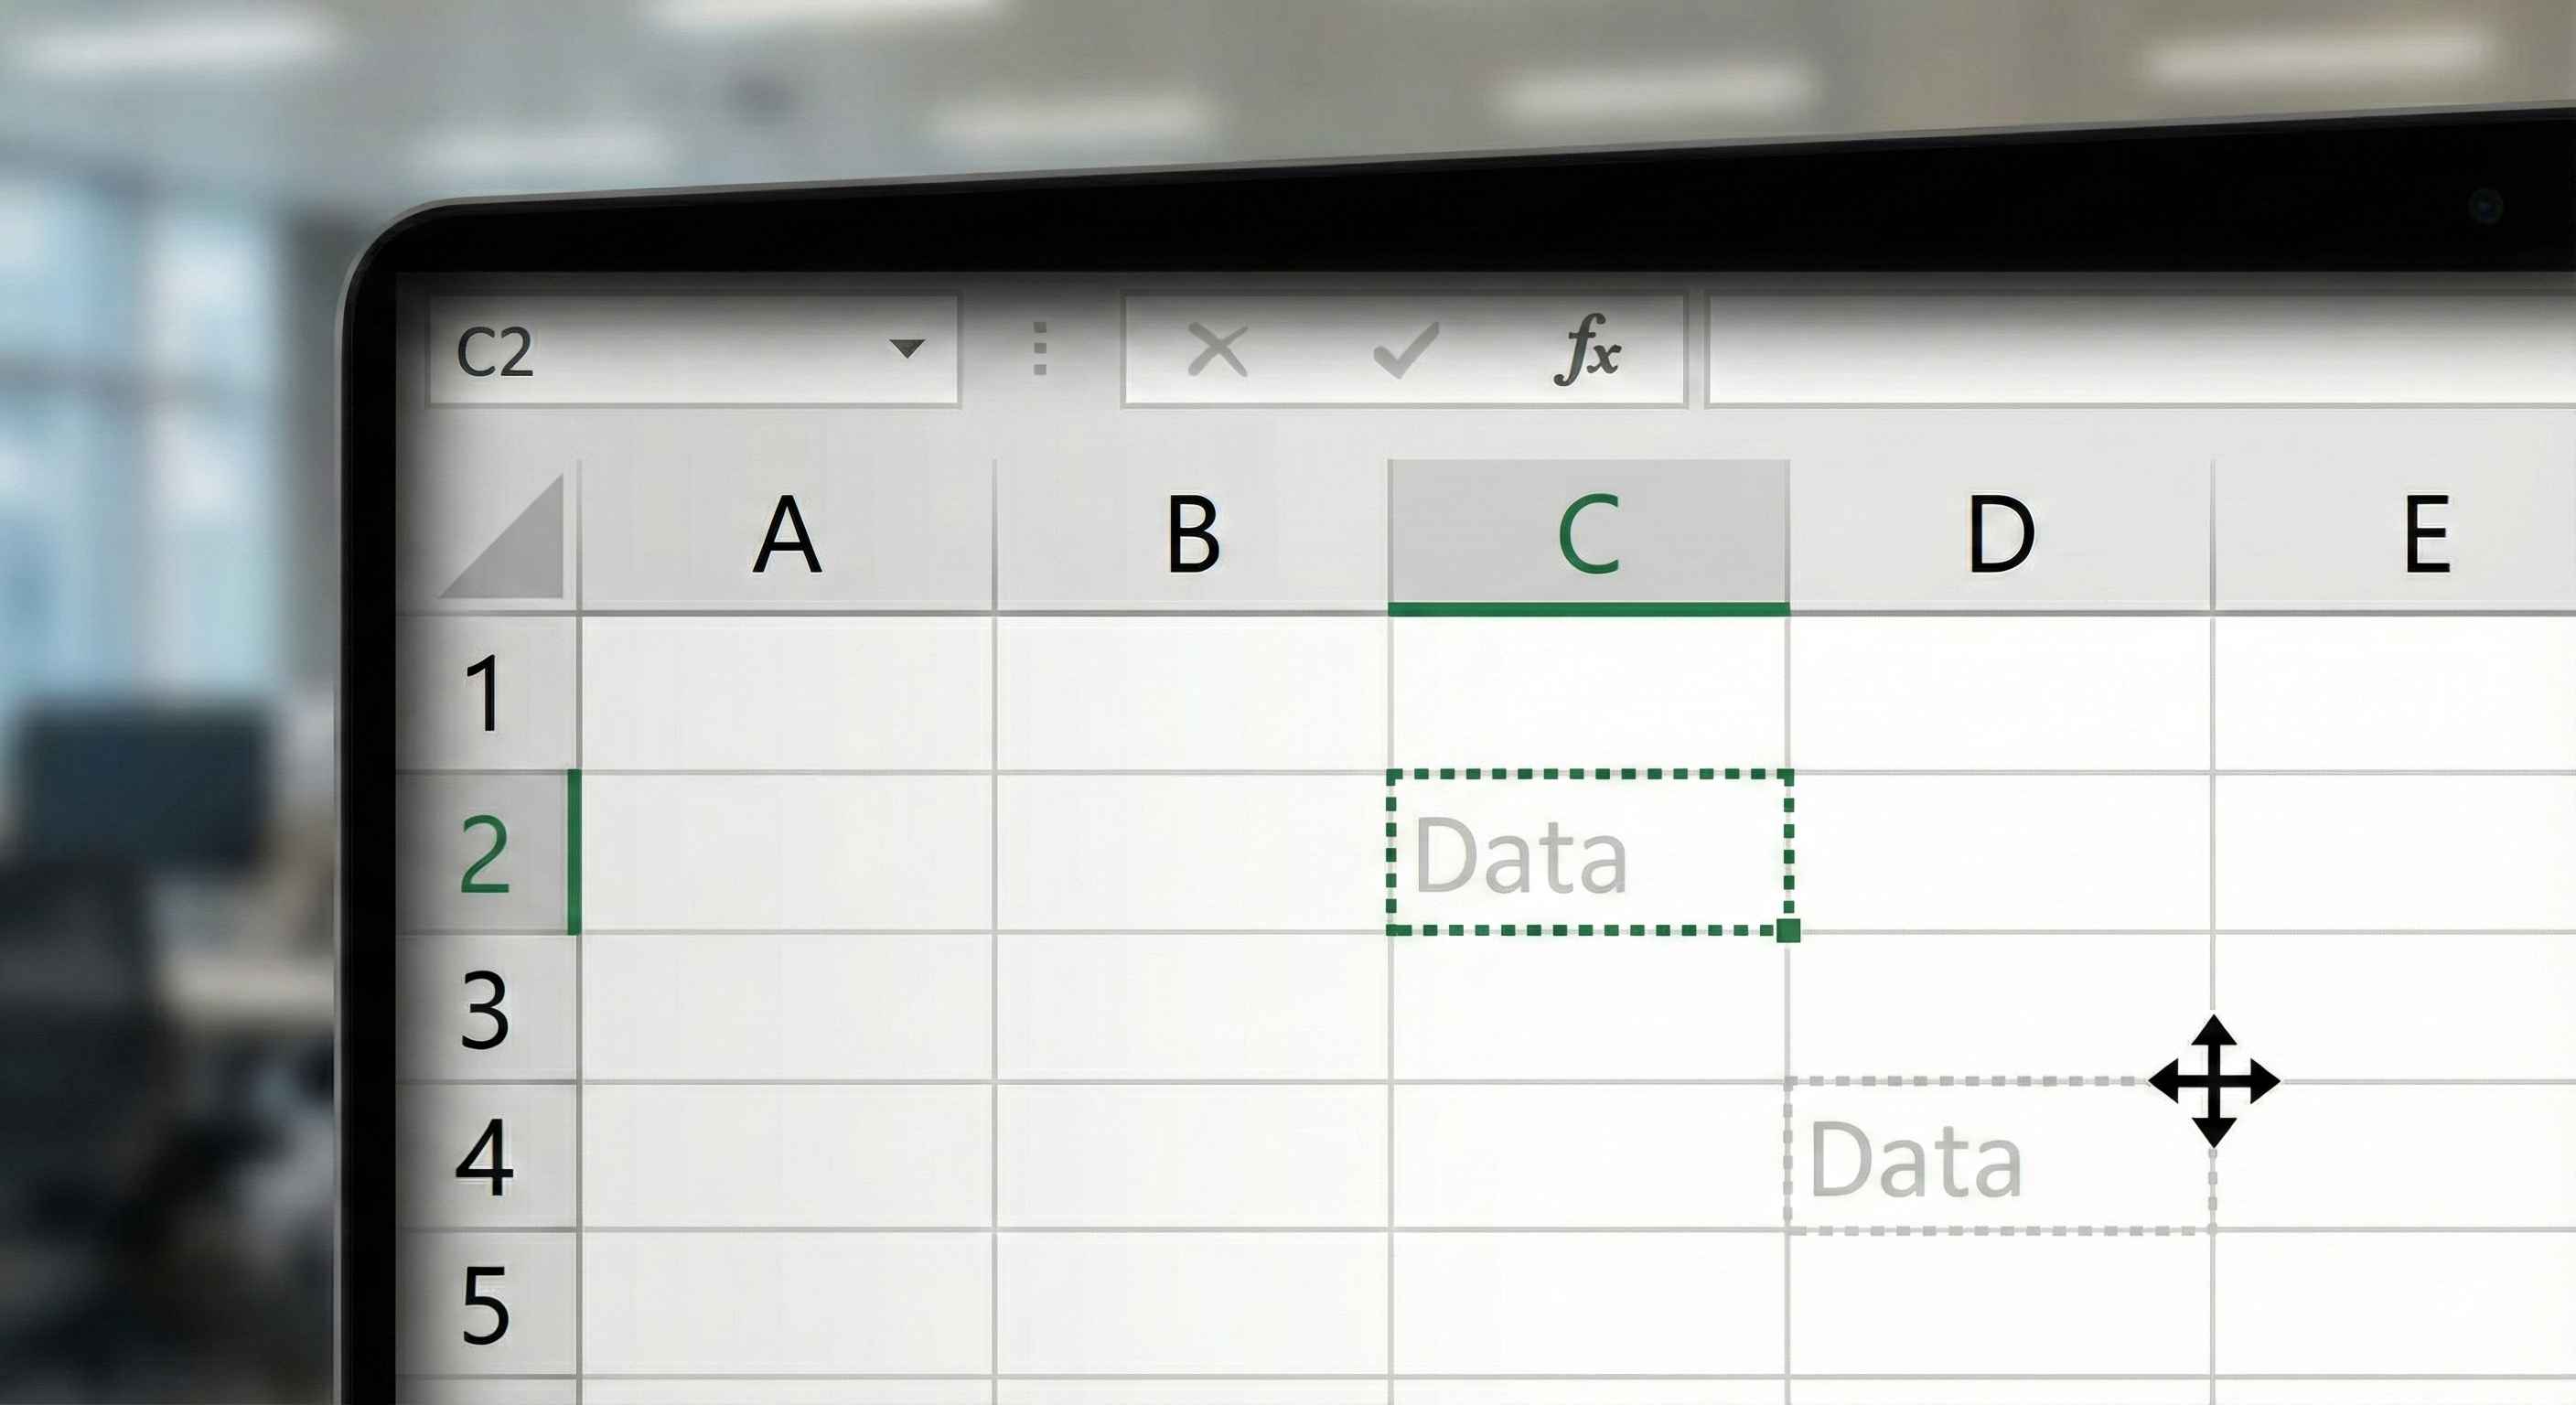
Step 3: Release to complete the move
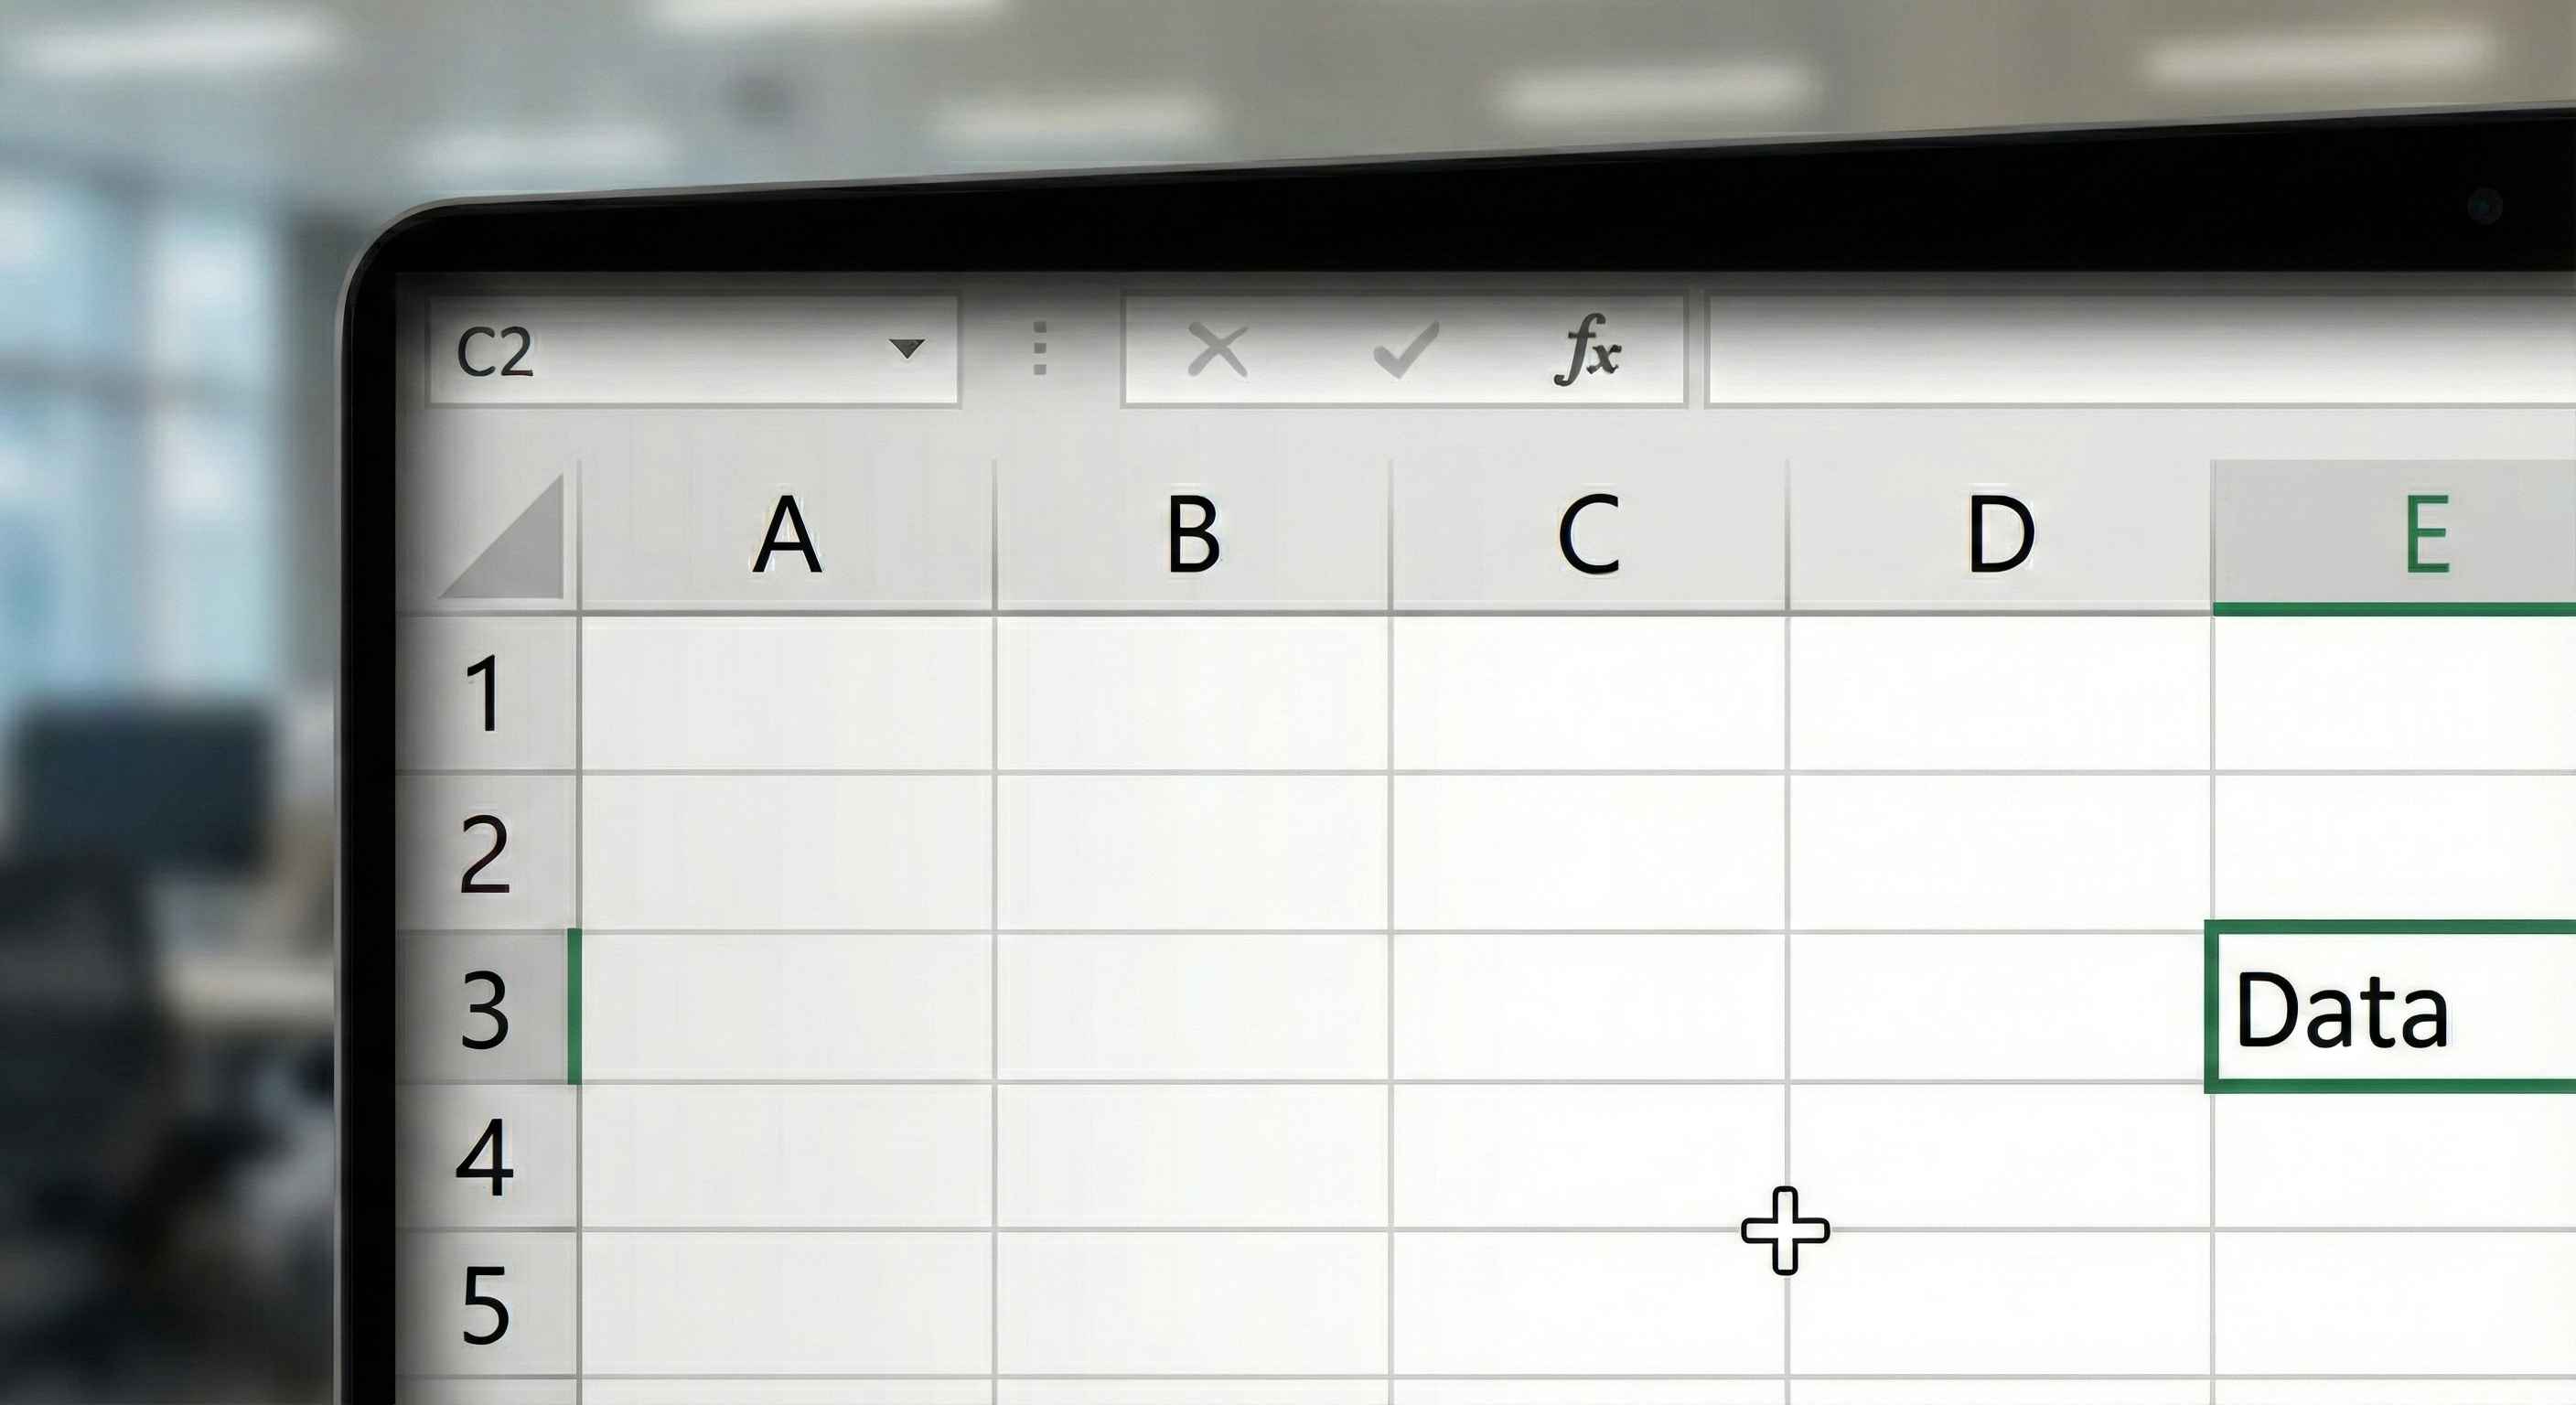
Result: The data moves to the new location!
Quick Tip: If you hold Ctrl while dragging, it COPIES instead of moves!
Copying Cells
Want to duplicate data? Use copy instead of cut!
Method 1: Copy and Paste
How to do it:
- Select the cell(s) you want to copy
- Press Ctrl+C (Windows) or Cmd+C (Mac)
- Click where you want the copy
- Press Ctrl+V (Windows) or Cmd+V (Mac)
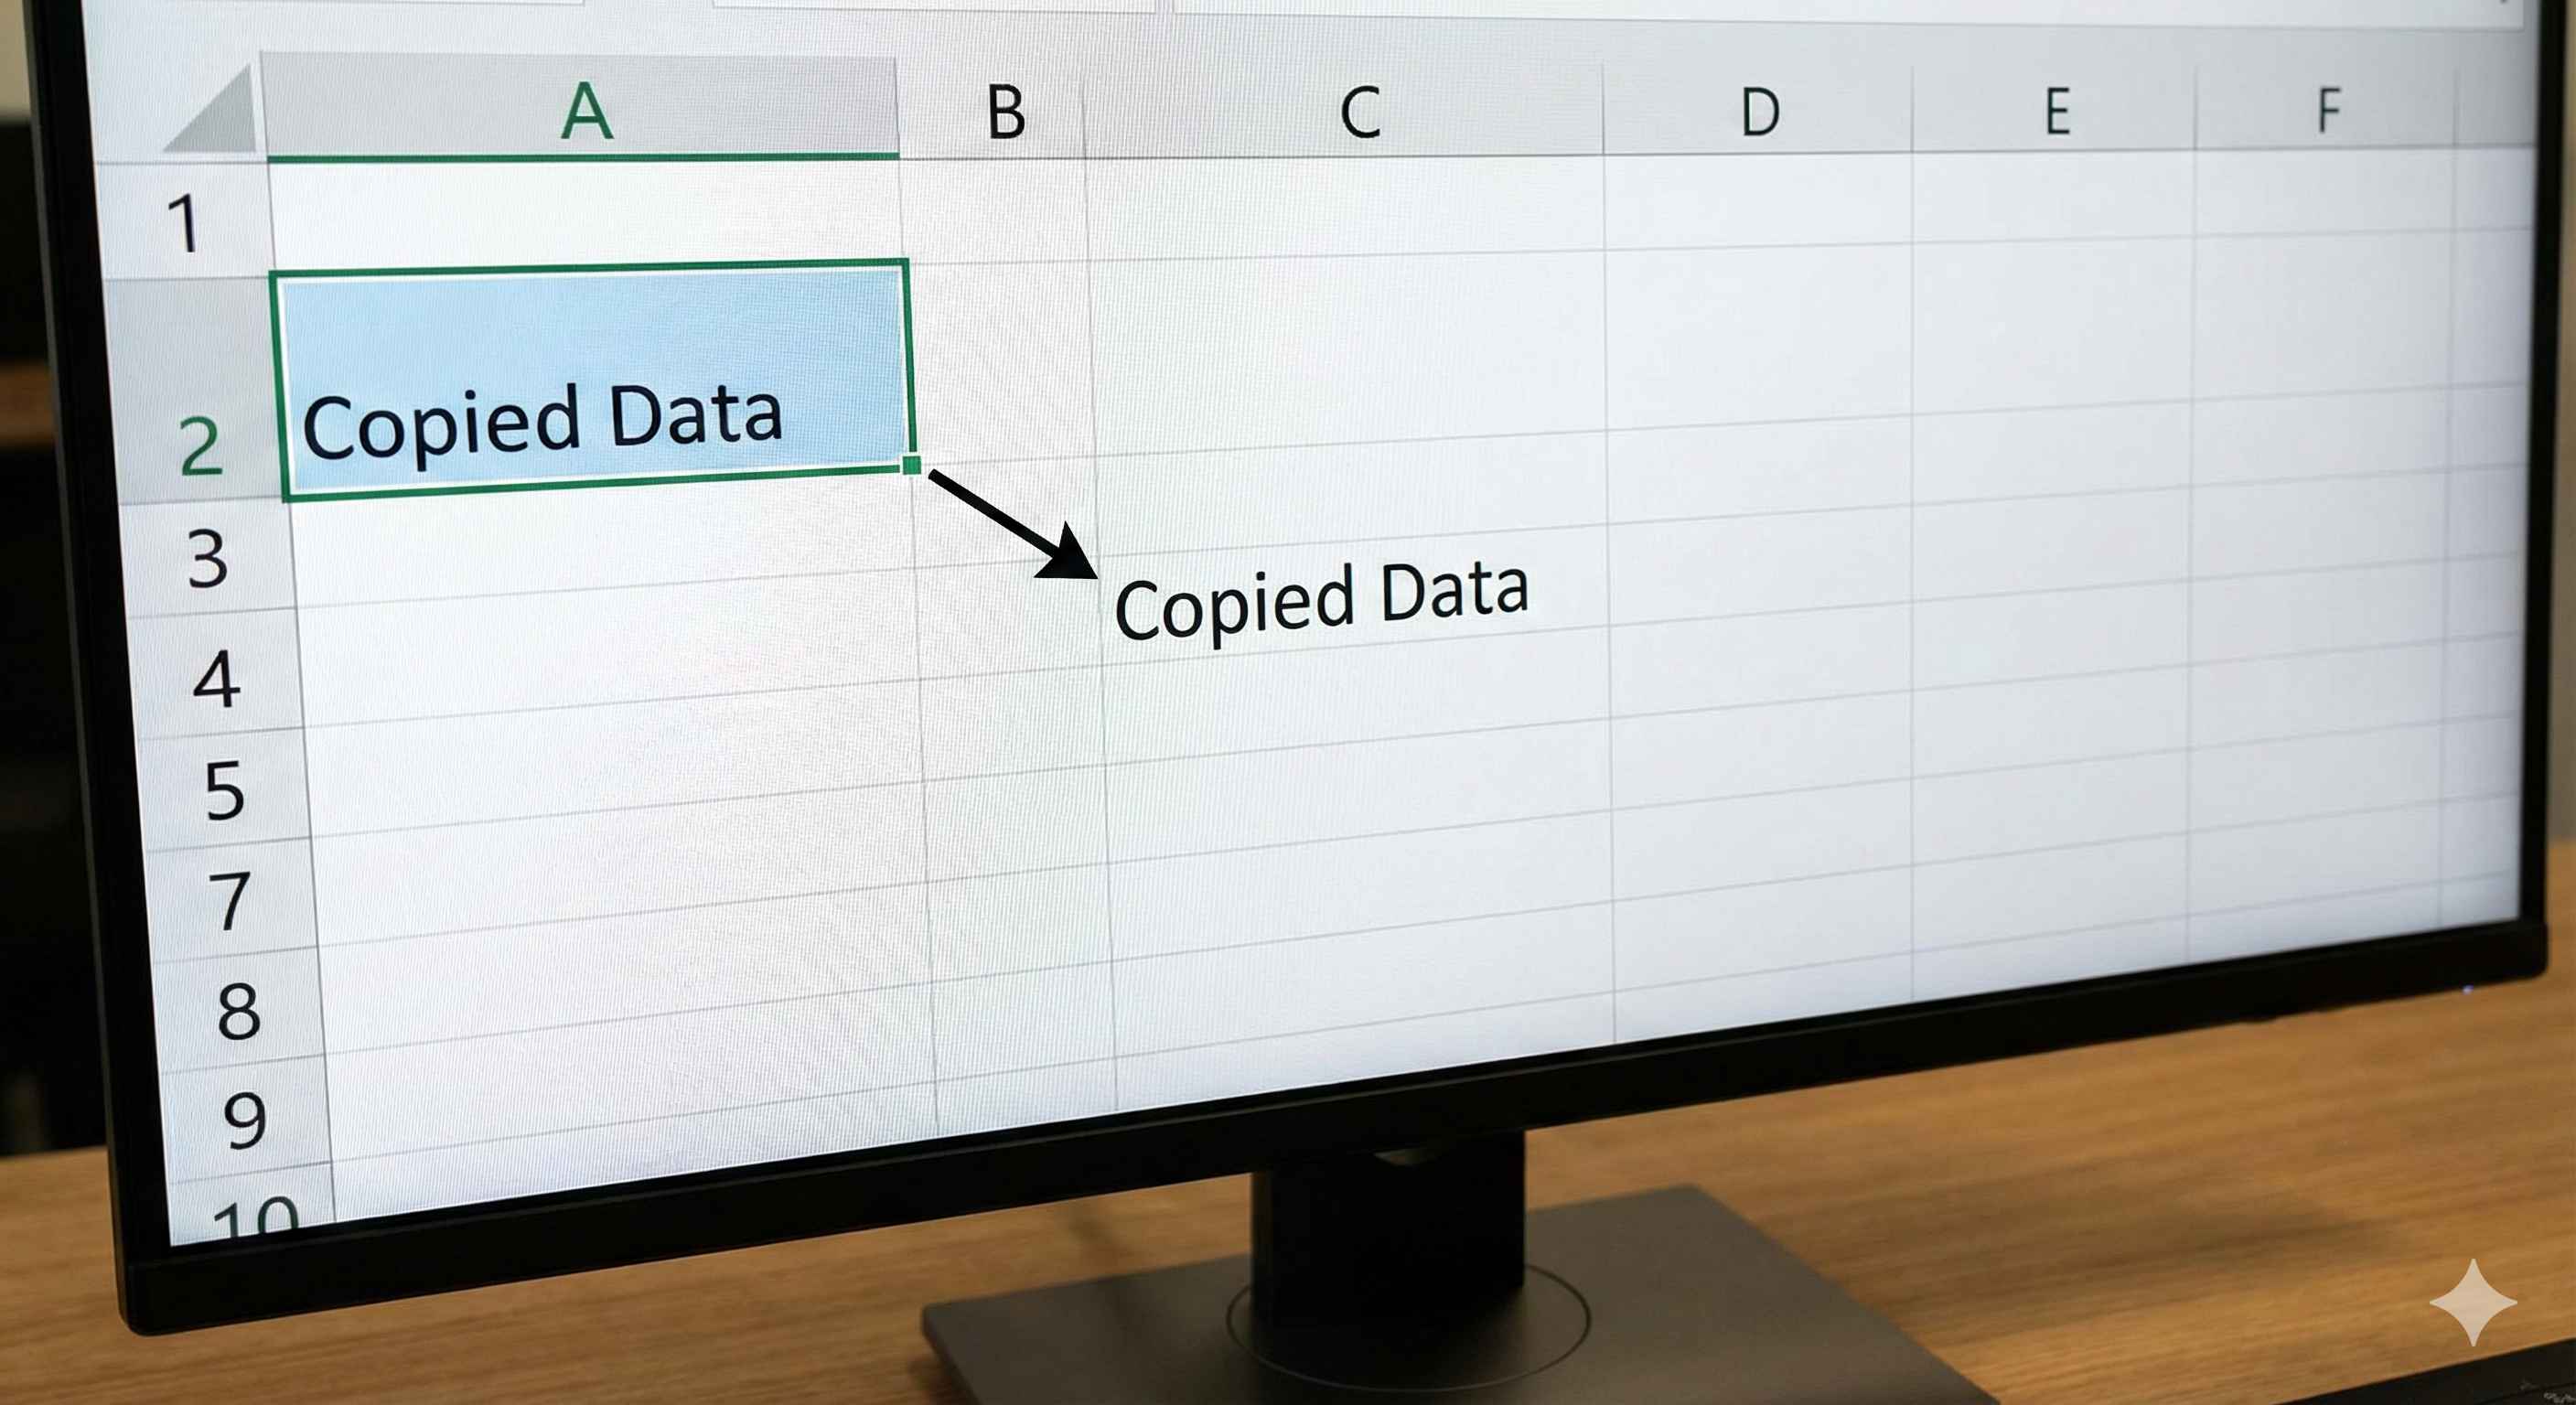
Result: The data appears in both places - original and new location.
Method 2: Ctrl+Drag
How to do it:
- Select the cell(s)
- Hold Ctrl key
- Move cursor to edge of selection
- Click and drag to new location
- Release mouse, then release Ctrl
A small + icon appears while dragging to show you're copying!
Deleting Cell Contents
Want to clear what's inside a cell? Simple!
Method 1: Delete Key (Easiest!)
- Select the cell(s)
- Press Delete key
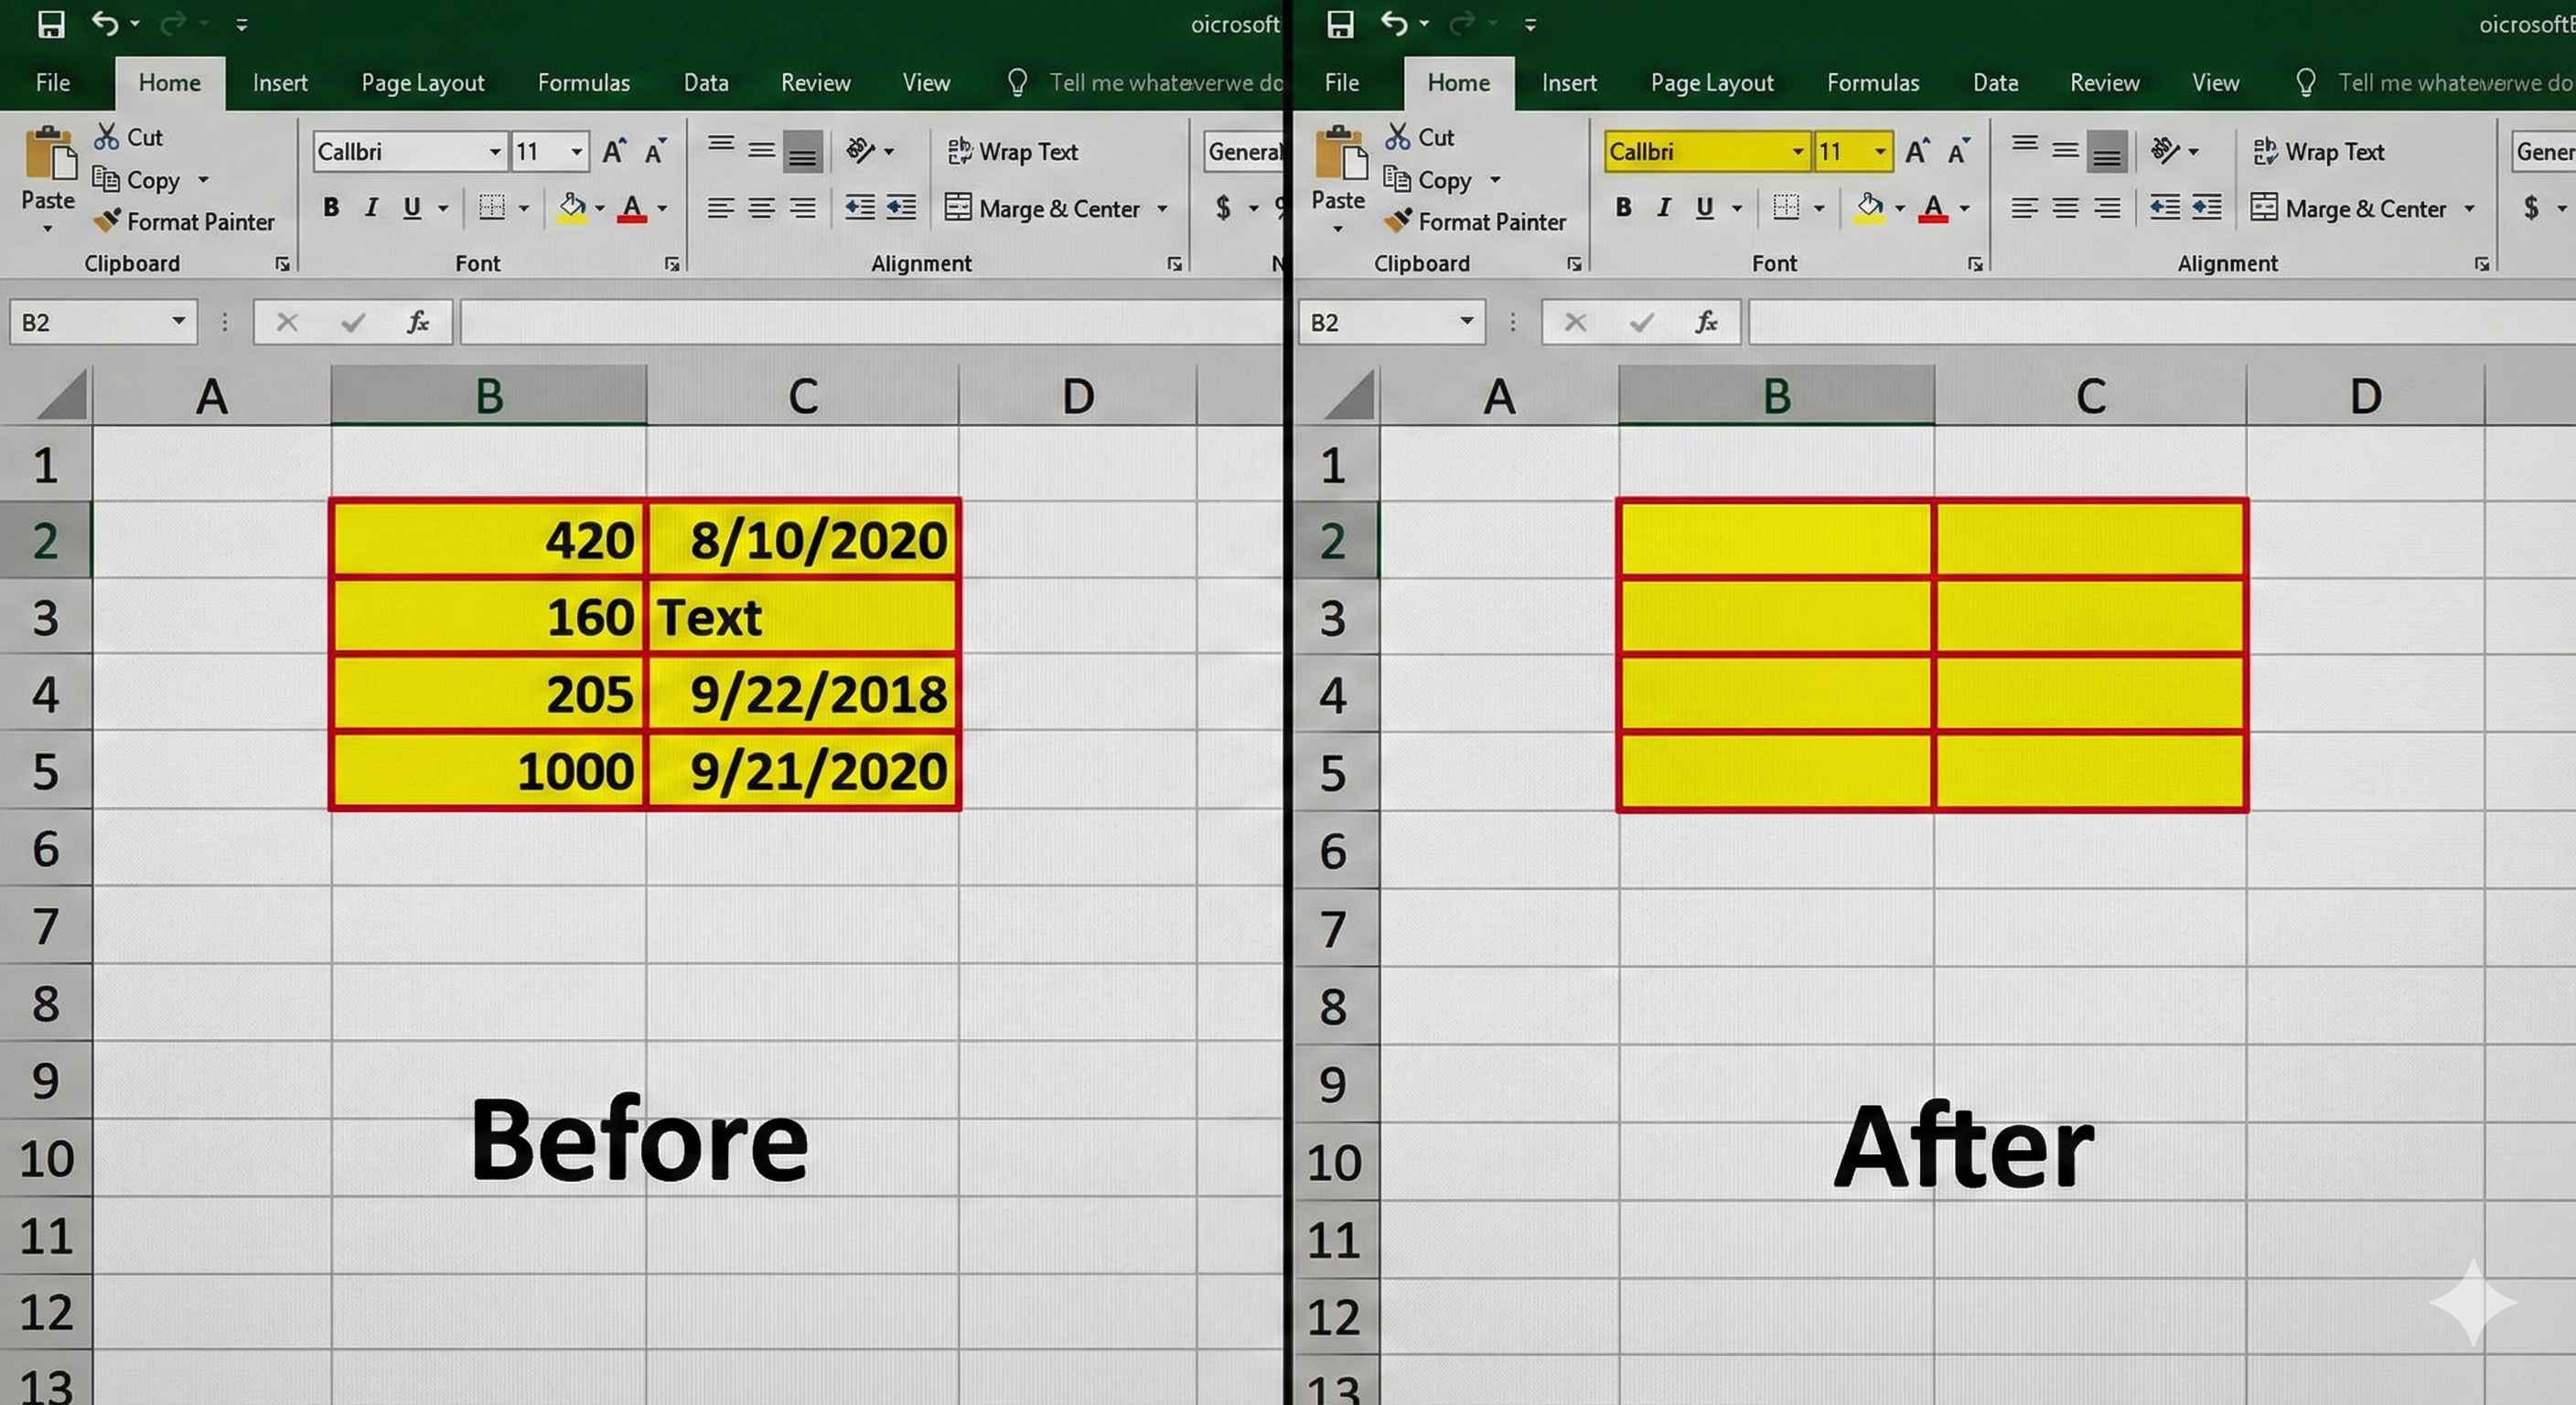
Result: The content disappears, but the cell remains. The formatting (colors, borders) stays.
Method 2: Right-Click Menu
- Select the cell(s)
- Right-click
- Choose Clear Contents
Deleting Entire Cells
This is different - you're removing the actual cells, not just the content!
How to do it:
- Select the cell(s) you want to delete
- Right-click
- Choose Delete...
- Choose an option:
- Shift cells left - Cells move left to fill the gap
- Shift cells up - Cells move up to fill the gap
- Entire row - Delete the whole row
- Entire column - Delete the whole column
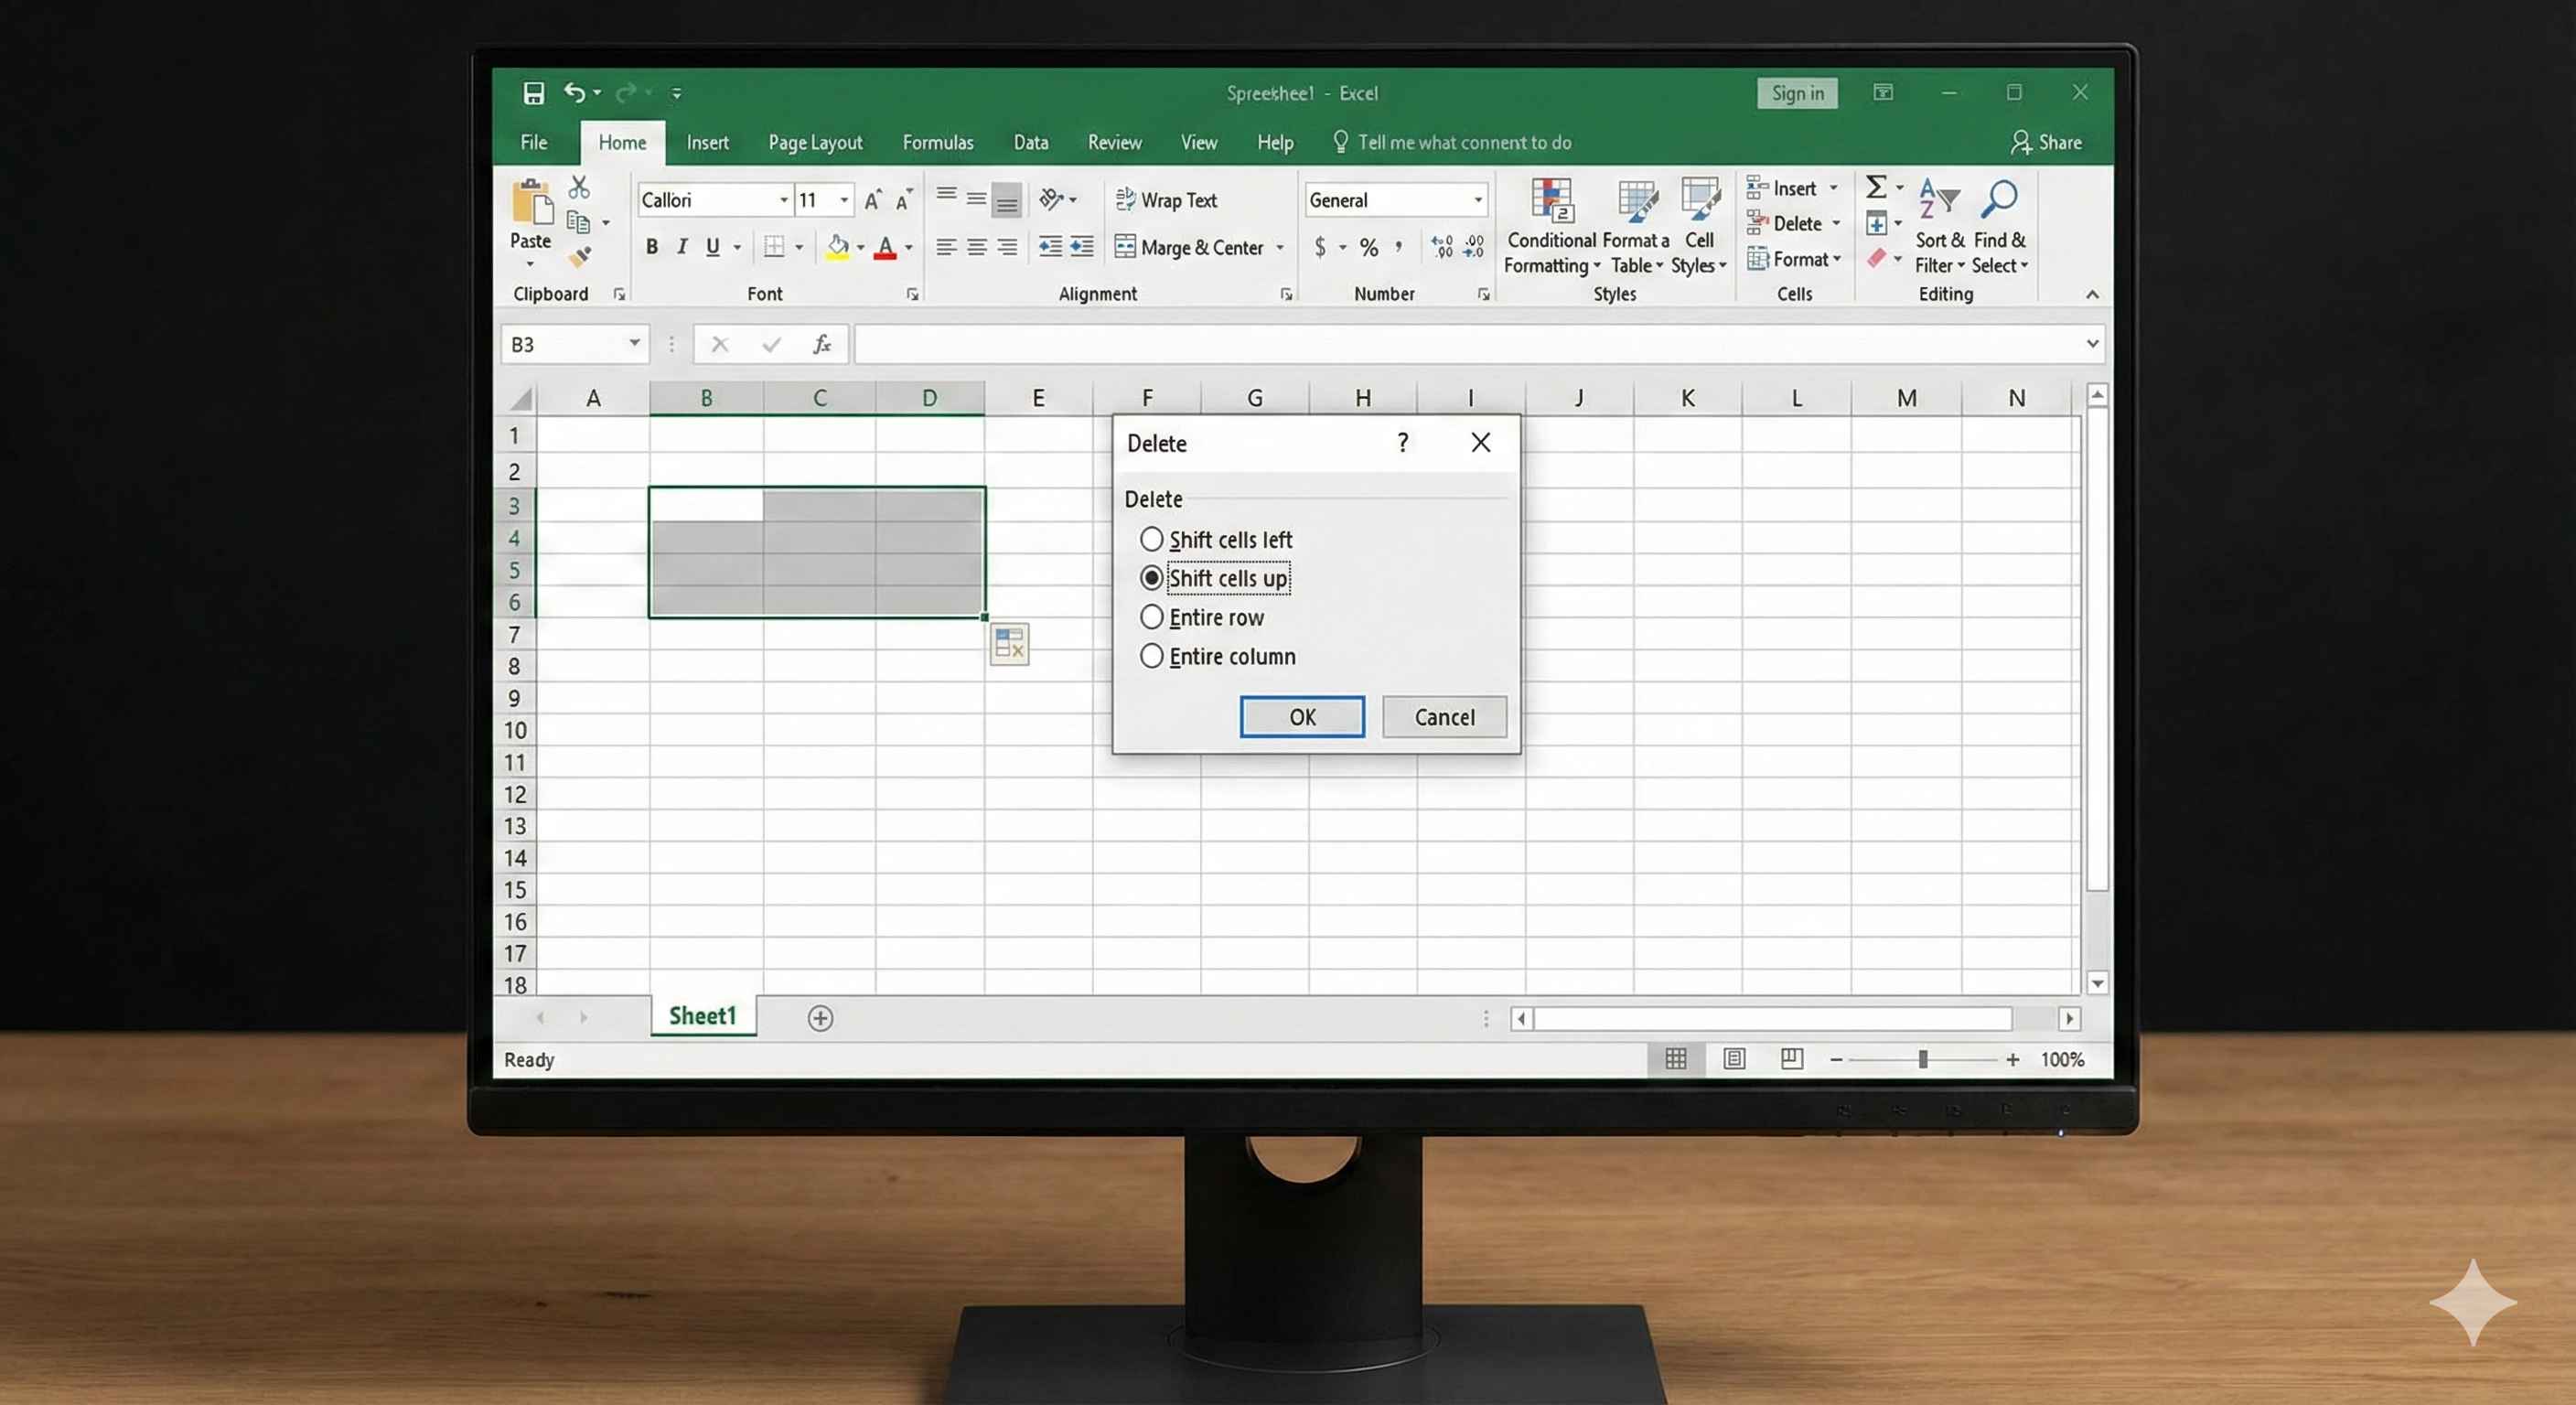
Be Careful! This actually removes cells and shifts your data around.
Inserting Cells
Need to add new cells in the middle?
How to do it:
- Right-click where you want new cells
- Choose Insert...
- Choose an option:
- Shift cells right - Push existing cells right
- Shift cells down - Push existing cells down
- Entire row - Insert a whole row
- Entire column - Insert a whole column

Excel makes room for your new cells!
Quick Summary Table
| Action | Keyboard Shortcut | What It Does |
|---|---|---|
| Cut | Ctrl+X (Cmd+X) | Remove and prepare to move |
| Copy | Ctrl+C (Cmd+C) | Duplicate data |
| Paste | Ctrl+V (Cmd+V) | Place cut/copied data |
| Delete Content | Delete | Clear cell contents |
| Fill Down | Ctrl+D | Fill down from top cell |
| Fill Right | Ctrl+R | Fill right from left cell |
| Undo | Ctrl+Z (Cmd+Z) | Undo last action |
Practice Exercises
Try these to master filling, moving, and deleting:
-
✏️ Number Series: Type 5, 10 in cells A1, A2. Select both and fill down to A10. What numbers appear?
-
✏️ Date Fill: Type today's date in B1. Fill down to B7 to get next 7 days.
-
✏️ Copy Text: Type "Excel" in C1. Use fill handle to copy it to C1:C5.
-
✏️ Move Data: Type something in D1. Move it to D5 using cut and paste.
-
✏️ Delete and Insert: Delete cell E1 and shift cells up. Then insert a new cell and shift cells down.
Common Mistakes to Avoid
❌ Dragging the whole cell instead of fill handle - You'll move the cell, not fill!
❌ Forgetting to select the starting cells - Excel needs a pattern to continue
❌ Using Delete instead of Right-click > Delete - One clears content, the other removes cells
❌ Not checking Auto Fill Options - Sometimes Excel guesses wrong, click the icon to fix it
Pro Tips
✅ Double-click fill handle when you have long columns - saves time!
✅ Use Ctrl+D to fill down and Ctrl+R to fill right - faster than dragging
✅ Hold Ctrl while dragging to copy instead of move
✅ Press Ctrl+Z immediately if you make a mistake - it undoes your last action
✅ Check the formula bar to see if formulas adjusted correctly after filling
Real-World Examples
🎯 Budget Tracking: Fill months (January, February...) across a row automatically
📊 Sales Data: Copy formulas down for 100 rows in seconds
📅 Project Timeline: Auto-fill sequential dates for your project schedule
📋 Inventory List: Fill product IDs or SKU numbers with patterns
What's Next?
Great job! You now know how to efficiently fill, move, copy, and delete cells in Excel.
In the next lesson, you'll learn about Undo & Redo - how to fix mistakes and experiment safely in Excel!
You'll discover:
- How to undo multiple actions
- How to redo what you undid
- Keyboard shortcuts for faster work
- Tips for safe experimentation
Keep practicing these techniques - they'll make you much faster in Excel!